





 Canada
 UK
UK France
 Australia
Taping has been used for years to help athletes recover and regain performance. More specifically, one researcher noted, “Taping may be a useful adjunct in the treatment of wrist instability and injury, particularly for patients with occupational-specific demands, such as musicians, athletes, or therapists”1.
But nowadays, the term “taping” doesn’t cut it anymore, as it has become an umbrella term for multiple modalities. Two types of taping, rigid taping and kinesiology taping, have been established and used for years to treat the same symptoms. Which one works better? That’s for you to decide. Today we outline two wrist-taping techniques featured in the Journal of Hand Therapy for you to try in your clinic to judge which tapes to use and when.
Wrist Instability Rigid Taping Technique
Ah, rigid tape, the tried and true method of taping. With its tight structure and its ease of application, many clinicians have reached for the rigid tape to treat instability of the wrist. “Rigid tape is used to support ligaments and the wrist joint capsule by limiting movement and providing proprioceptive input… Rigid tape can also be used as a temporary substitute and/or means of assessing for orthotic use and may also be used to address soft tissue issues at the wrist”.1
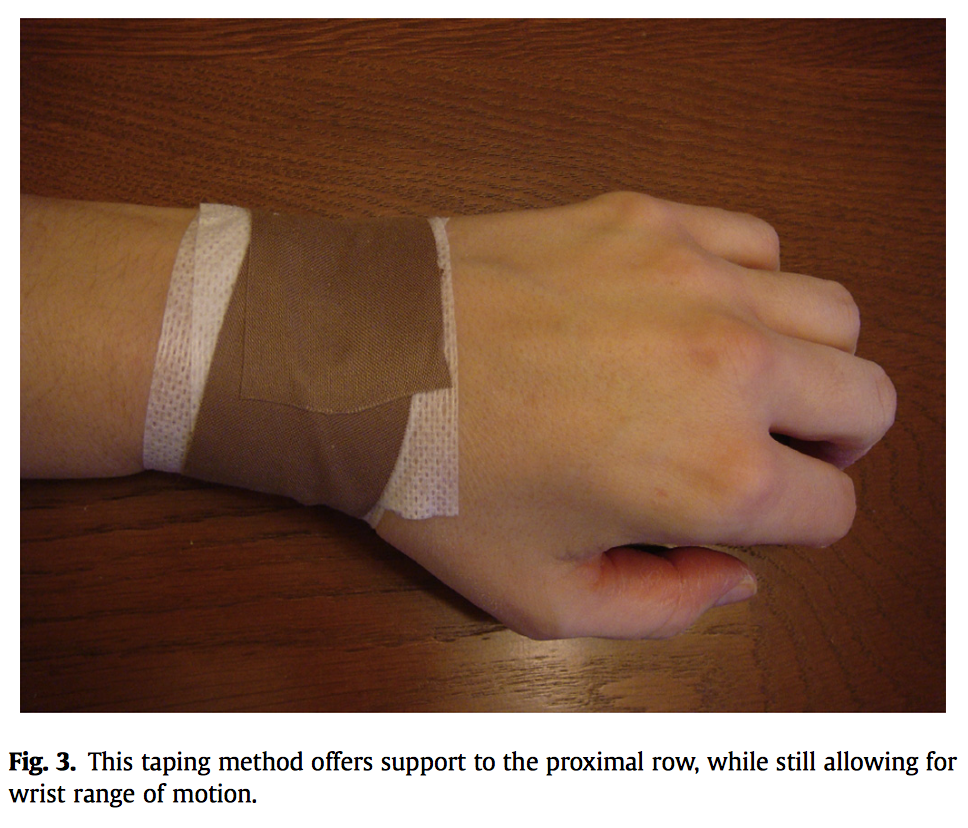
The authors offered up the following taping method to assist in the treatment of ligamentous laxity at the scapholunate interval.
- To start, place the patient’s forearm in supination with the wrist in ulnar deviation and the digits grasping the thumb to promote extension of the scaphoid.
- Place a short piece of white tape over the scaphoid tubercle around the radial half of the wrist, ending at the central aspect of the dorsal wrist.
- Place a second piece of white tape over the pisiform, wrapped around the ulnar half of the wrist to end slightly overlapping the first piece.
- Now with rigid tape, apply the first piece over the white tape, anchoring over the scaphoid tubercle and pulled circumferentially over the radial wrist, again ending at the central aspect of the dorsal wrist.
- Place a second piece of rigid tape along the ulnar aspect of the wrist over the pisiform and pulled circumferentially along the ulnar wrist, ending at the central aspect of the dorsal wrist.

Kinesiology Taping Technique for Nerve Disorders of the Wrist
Switching to the other side of the taping spectrum, kinesiology tape is a growing method of pain relief in clinics around the world. With multiple theories of its mechanisms, it’s hard to prove the exact reason why or if kinesiology tape works, but multiple studies have touted its many benefits. “[Kinesiology] tape is more conforming, and therefore allows for normal tissue expansion. It is used to compress and support soft tissue structures. This form of taping has been found to be beneficial in treating repetitive stress disorders at the wrist”.1
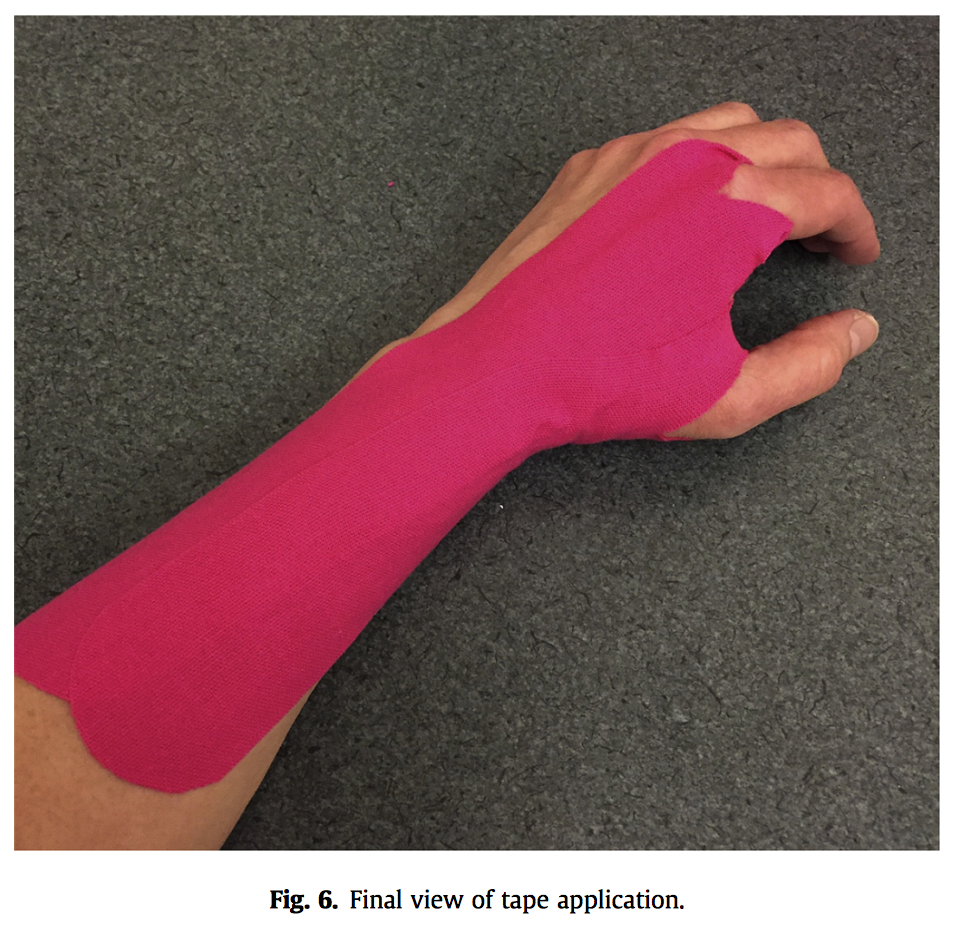
The second taping technique proposed by the authors was a kinesiology taping technique for anyone suffering from a neuropathy known as Wartenberg’s Syndrome:
- To start, place the patient’s forearm in pronation and the thumb in opposition.
- With your first piece of kinesiology tape, make a diamond cut in the distal end of the elastic tape. Place the index finger through this hole. Lay the remainder of the tape down along the dorsal aspect wrist and forearm.
- Place the wrist in slight flexion.
- With your second piece of kinesiology tape, cut the same diamond and place the thumb through the hole. Lay the remainder of tape along the dorsoradial aspect of the wrist and forearm.


From here, we hope you can make an informed decision on what taping method is going to be best for the next wrist you treat. Explore all our available taping options.
Products from this article:




Reference
- Porretto-Loehrke A 2016. Taping techniques for the wrist. J Hand Ther. 29(2):213-6.
Medical Disclaimer: The information provided on this site, including text, graphics, images, and other material are for informational purposes only and are not intended to substitute for professional medical advice, diagnosis, or treatment. Always seek the advice of your physician or other healthcare professional with any questions or concerns you may have regarding your condition.