Key Takeaways
- Volleyball is one of the most popular sports in the world and players can see a variety of injuries from sprains and strains in the ankle or wrist to rotator cuff tendonitis
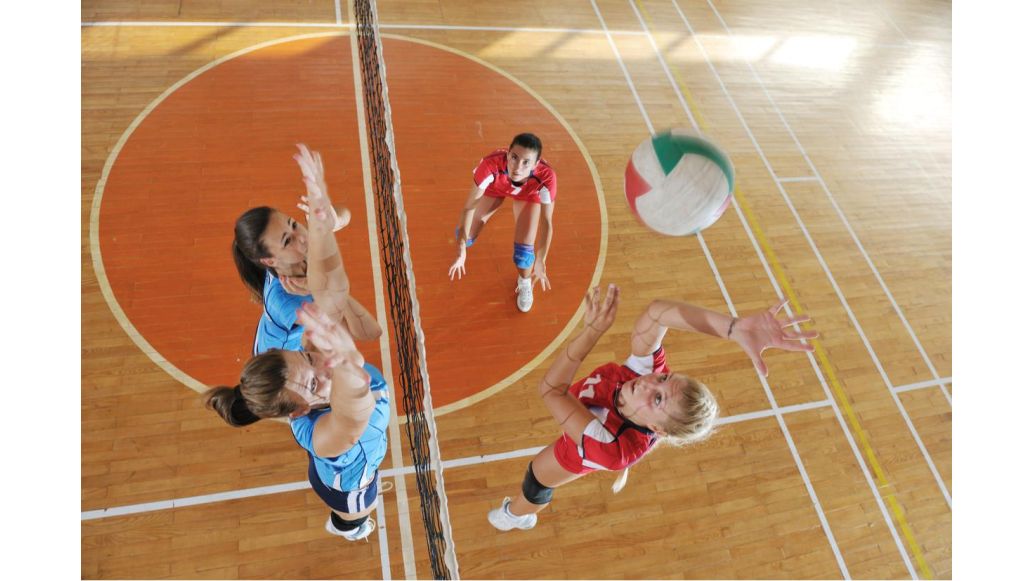
- Ankle sprains and strains are the most common injuries seen in volleyball players, especially players near the net
- Supervision during practice, collecting loose balls, and awareness on the court play an essential part in preventing injuries
- Learn more about treatment methods for common volleyball injuries!
Top Products in This Article
Volleyball is one of the most popular sports in the world. It has the second highest participation rate worldwide (after soccer) and two Olympic events (beach and indoor).1 Over 460,000 U.S. high school students participate each year (that’s more than the population of Virginia Beach, VA) and more than 410,000 of those students are girls (more than the population of Tampa, FL).2,3
With so many participants, it’s no surprise that a study done by the Center for Injury Research and Policy estimates there are 58,127 female U.S. high school volleyball player injuries each year.4 If each injury occurred in an individual volleyball player, that would mean ~14% of all female volleyball players are injured each year. The good news is there are ways to treat and prevent these injuries.
Learn more about how to treat and prevent volleyball injuries and keep your volleyball players in the game!
Table of Contents
The Top 10 Most Common Volleyball Injuries
Volleyball Injury Statistics
Learn How to Treat and Prevent 5 Common Volleyball Injuries
Injury 1: Ankle Sprains and Strains
Injury 2: Concussions
Injury 3: Other Sprains/Strains (Trunk, Hip, Thigh, Finger...)
Injury 4: Knee Injuries (Jumper’s Knee/ACL Tears)
Injury 5: Shoulder Injuries (Rotator Cuff Tendonitis/Shoulder Impingement)
The Top 10 Most Common Volleyball Injuries
According to a research study done by Center for Injury Research and Policy, the ten most common high school volleyball injury diagnoses in during the 2018-19 school year were:4
- Ankle Sprain/Strain (23.6%)
- Concussion (15.3%)
- Hand/Wrist Sprain/Strain (9.8%)
- Shoulder Other (6.6%)
- Knee Sprain/Strain (6.3%)
- Trunk Sprain/Strain (5.1%)
- Shoulder Sprain/Strain (5%)
- Knee Other (4.4%)
- Hand/Wrist Fracture (4.3%)
- Hand/Wrist Other (2.2%)
A 2017 study on injuries in collegiate women’s volleyball did a four-year retrospective analysis of injury data on 20 athletes and found similar results. The knee, shoulder, and ankle were the most frequently injured body areas.15
Volleyball Injury Statistics
Learn more about volleyball injury statistics from these infographics!
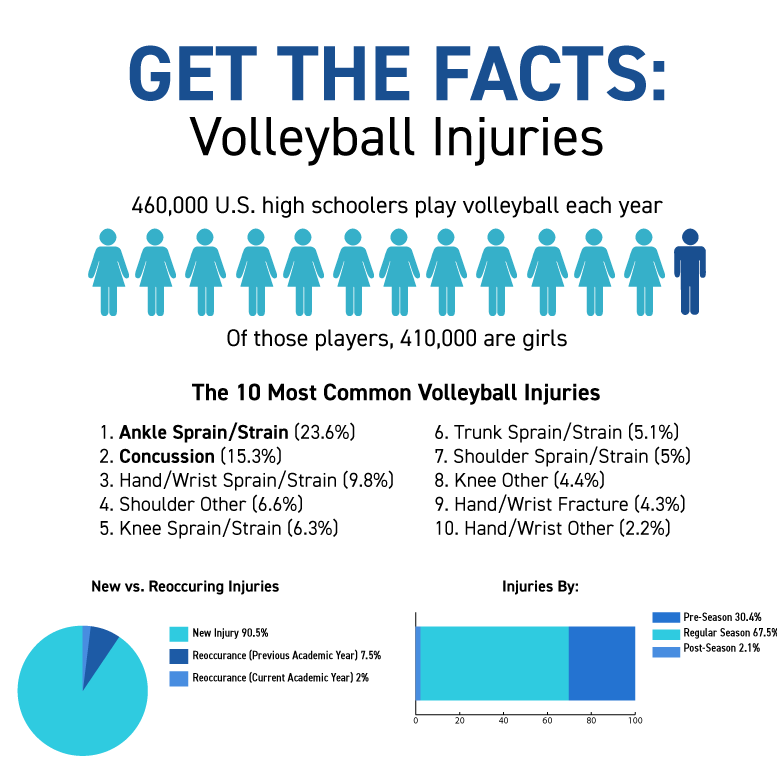
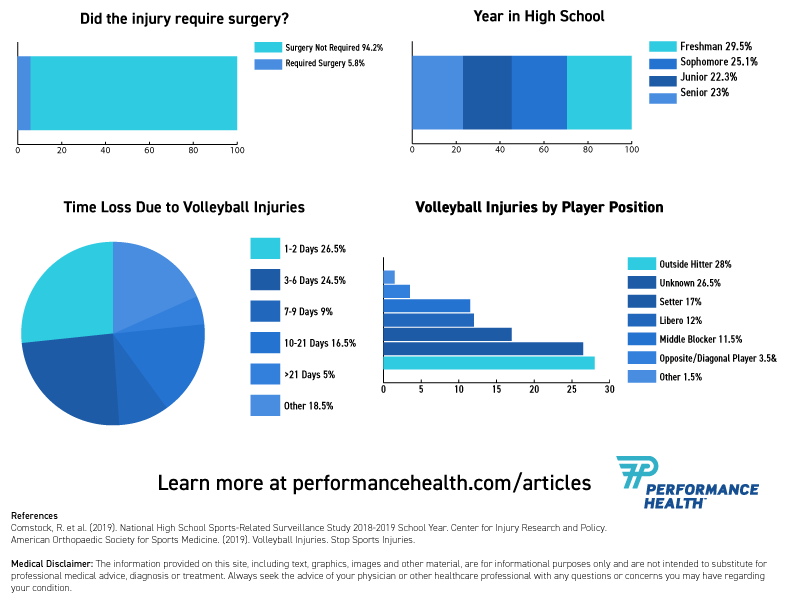
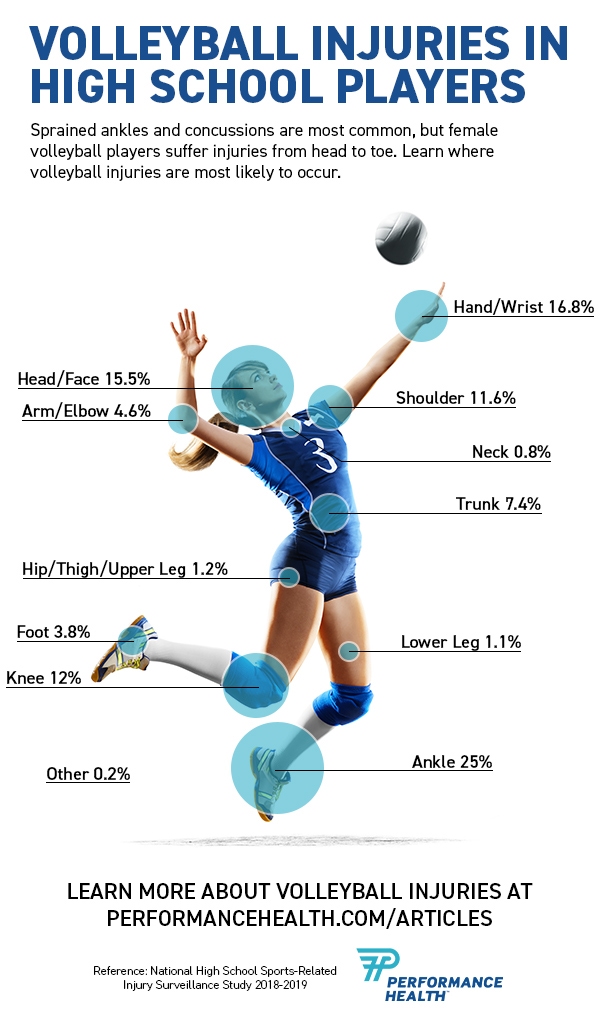
Learn How to Treat and Prevent 5 Common Volleyball Injuries
Injury 1: Ankle Sprains and Strains
Causes
Ankle sprains and strain are the most common injury in volleyball, making up 23.6% of volleyball injuries.4 They often occur at the net when an opposing player lands on another player’s foot. A sprain occurs if the ligament is stretched or torn while a strain occurs if a tendon or muscle tissue is stretched or torn. Both can lead to a painful injury.
Symptoms
Sprained/strained ankle symptoms may include:
- Pain or tenderness
- Bruising
- Swelling
- Limited range of motion
- Ankle instability
- A popping sound at the time of injury
Treatment
Have a medical professional, like a certified athletic trainer or doctor evaluate your ankle to ensure you don’t have a more serious injury. Then follow the R.I.C.E. method during your recovery.
Rest: Rest and avoid putting weight on your ankle for the first 24-48 hours.
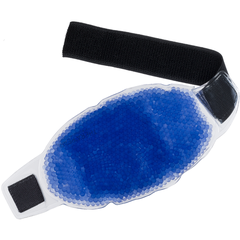
Ice: Ice your ankle for 15-20 minutes every 2-3 hours to reduce pain and swelling. Reusable ankle wraps are a mess-free solution. Use two so one can chill while you use the other.
Compression: Wrap your injury to help prevent swelling.
Elevation: Raise your ankle above the level of your heart. Lie down and prop it up on pillows or a wedge cushion.
After the acute inflammation and swelling have gone down, you can use an ankle brace or kinesiology tape to give your ankle support as it continues to heal.
How to Apply Kinesiology Tape To A Sprained Ankle
Prevention
To prevent a recurrence, make sure you exercise your ankle. Studies have found that progressive balance exercise programs are effective at reducing ankle sprain reoccurrence.7 A THERABAND Stability Disc is an excellent tool for balance training. Get started with 1-leg balance, ankle flexion ROM, and stepping exercises.
And be proactive about preventing another ankle sprain during your volleyball practices or games by either taping your ankle as shown in the video above or wearing an ankle brace.
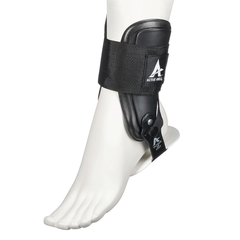
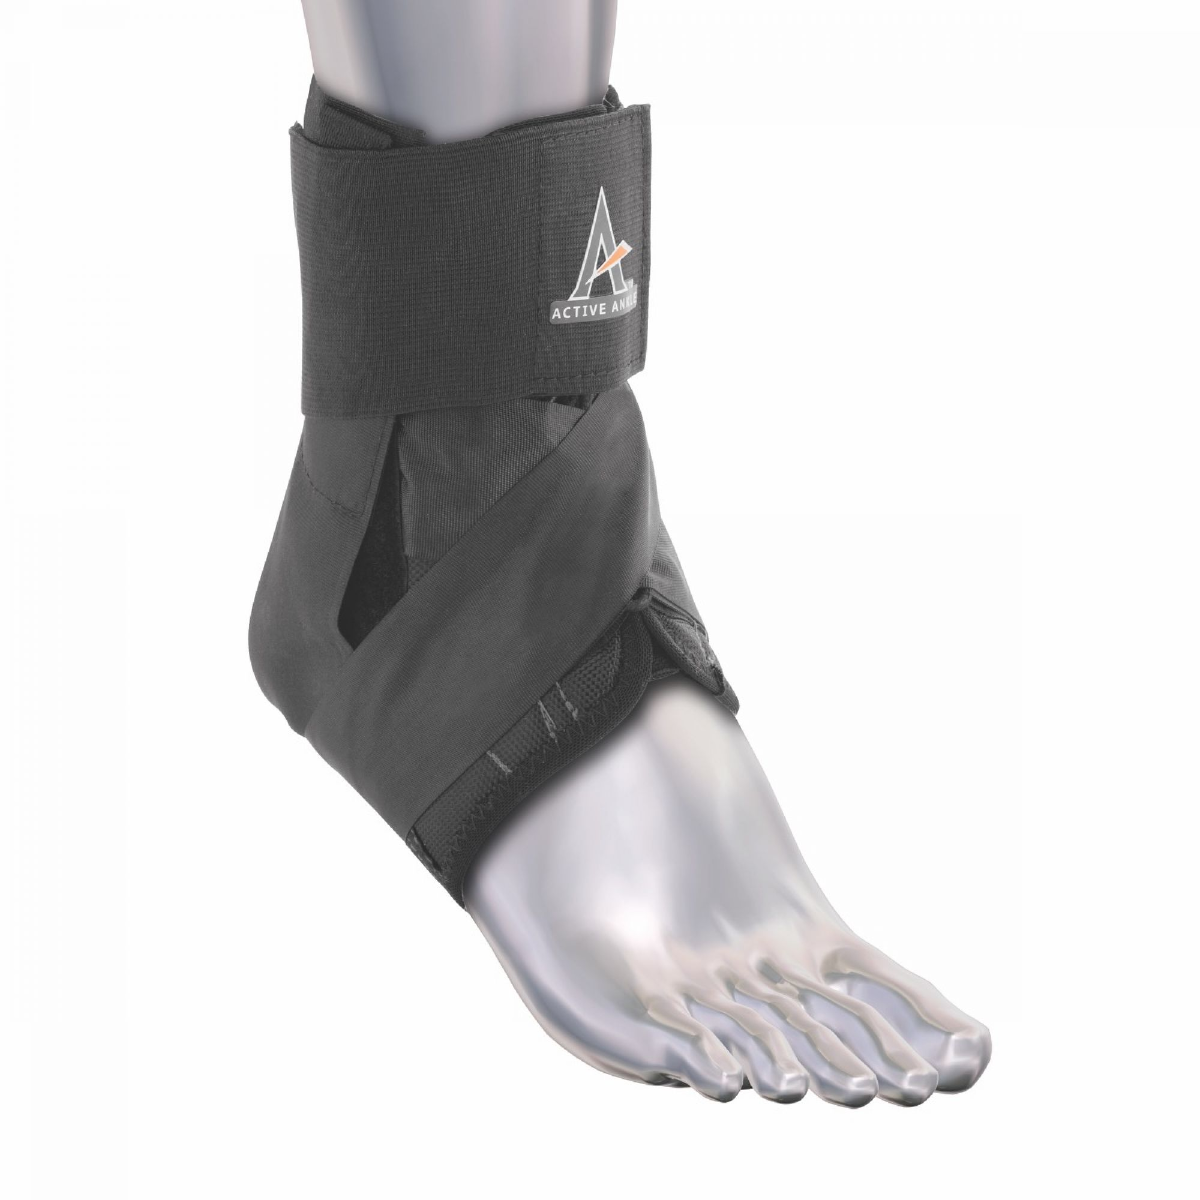
Front row players are more susceptible to ankle injuries due to lateral movements, jumps, and under-the-net contact. A more rigid brace like the Active Ankle T2 offers needed support. Back row players still need support, but they also need more mobility for digging and diving. The Active Ankle AS1 Pro might be a better choice. If you have strong ankles, don’t like the feel of a brace, or have never worn one before the Active Ankle 329 Sleeve still offers support but may be more comfortable for you.
Learn more about ankle sprain guidelines from Phil Page, PhD, PT, ATC, CSCS, FACSM, LAT
Injury 2: Concussions
Causes
Concussions made up over 15% of all volleyball injuries in the study done by the Center for Injury Research and Policy.4 Concussions are caused by a blow or bump to the head. In volleyball this may be from a ball, another player, or a piece of equipment like the net poles.
The brain is soft tissue, cushioned by spinal fluid, within the skull. A blow to the head can jolt your brain, literally moving it around, causing bruising or damage to blood vessels or nerves that result in a concussion.
Symptoms
Symptoms of a concussion may include:
- Dizziness/Balancing problems
- Headache
- Nausea
- Confusion
- Clumsiness
- Slurred speech
- Blurred vision
- Sensitivity to light and/or noise
- Ringing in ears
- Sluggishness
- Concentration difficulties
- Memory loss
- Behavior or personality changes
Grades of Concussion
Concussions come in three grades of severity. A medical professional can help determine the severity of your concussion.
- Grade 1: Mild, no loss of consciousness, symptoms last less than 15 minutes
- Grade 2: Moderate, no loss of consciousness, symptoms last more than 15 minutes
- Grade 3: Severe, loss of consciousness (even if it only lasts a few seconds)
Treatment
Seek medical attention immediately if you believe you may have a concussion. Follow your doctor’s specific instructions. Six common steps for concussion management include:
- Cognitive Rest
- Avoid activities like texting, video games, television, computer use, and schoolwork that require a lot of concentration and attention
- Physical Rest
- Avoid physical activity that exacerbates your symptoms, including anaerobic exercises, weight lifting, household chores, and other activities
- Medication/Intervention
- Your doctor may recommend taking medication to relieve specific concussion symptoms
- Noise cancelling headphones or ear plugs can help reduce phonophobia from loud noises
- Sunglasses can help reduce photophobia due to bright lights or sunlight
- Transition Back to School
- Alert school personnel and teachers
- Teachers may want to consider offering forgiveness of missed assignments, rest breaks, decreased schoolwork, distraction-free work areas, a notetaker, and/or more time to complete tests and homework
- Avoid standardized tests during recovery
- Monitor 2-3 months post-concussion for scholastic difficulties
- Graded Return to Play
- Return to play should not occur until after a rest period, symptom resolution, and a doctor’s permission. Each of the following steps toward returning to play should take at least 24 hours
- Non-impact aerobic exercise
- Sport-specific exercise (non-impact)
- Non-contact training drills
- Full contact practice
- Return to normal play
- Athletes should be symptom-free and medication-free before starting the return-to-play protocol
- If symptoms develop, the activity should be stopped immediately. 24 hours after the symptoms resolve, athletes can resume at the last step where they were asymptomatic
- Return to play should not occur until after a rest period, symptom resolution, and a doctor’s permission. Each of the following steps toward returning to play should take at least 24 hours
- Considerations for Higher Risk Players
- Players with more than 3 symptoms, history of concussion, under the age of 18, loss of consciousness for more than 60 seconds, headache for longer than 60 hours, amnesia, comorbid conditions, medication use, etc. may be considered high risk
- These athletes should receive a multidisciplinary approach (like formal neuropsychological testing, a referral to a healthcare professional experienced in concussion management, and extensive communication with the coach and training staff)
Learn more about concussion management from Dr. Greg Stewart in this video.
Prevention
While concussions are most common during competition, you can reduce your risk of concussion during practice by following these steps:
- Make sure all practice sessions and scrimmages are supervised by your coach
- Reduce the number of free balls in the air during serving drills and hitting lines
- Never turn your back to a server or hitter (including during huddles)
- During practice, make sure everyone serves and hits in one direction, then shag (collect) all of the balls, then serve and hit in the opposite direction
- Shag for your opponents during warmups so no one has to go under the net or turn their backs to an incoming ball
- Always call before hitting/serving
- Ideally have only one ball in play for each defensive player and make sure they are aware of incoming balls
- Make sure anyone chasing/picking up loose balls around the court is aware of incoming balls
Injury 3: Other Sprains/Strains (Trunk, Hip, Thigh, Finger...)
Sprain vs. Strain
Sprains and strains can both leave you in pain, but they are different injuries. A sprain is caused by the stretching or tearing of ligaments (fibrous bands of tissue that connect bones at the joint). While a strain or “pulled muscle” is caused by the stretching or tearing of a tendon or muscle tissue.
Causes
Anything that puts sudden or unaccustomed stress on your joints or muscles can a sprain/strain. Overuse can also lead to stretching, irritation, or inflammation of your ligaments or muscles.
In volleyball specifically, trunk sprains can be caused by repetitive bending or rotating of your trunk. Finger sprains are commonly caused by setting or blocking. Other common finger injuries include dislocations and tendon tears.
Symptoms
Symptoms of sprains and strains may include:
- Pain
- Swelling
- Bruising
- Muscle spasms
- Trouble moving the joint/muscle
Treatment
A medical professional can help determine if your injury is a sprain, a strain, or a more serious injury. Treatment of sprains and strains typically involve the R.I.C.E. treatment.
R: Rest and avoid putting stress on your injured body part for 24-48 hours
I: Ice the area to reduce pain and inflammation
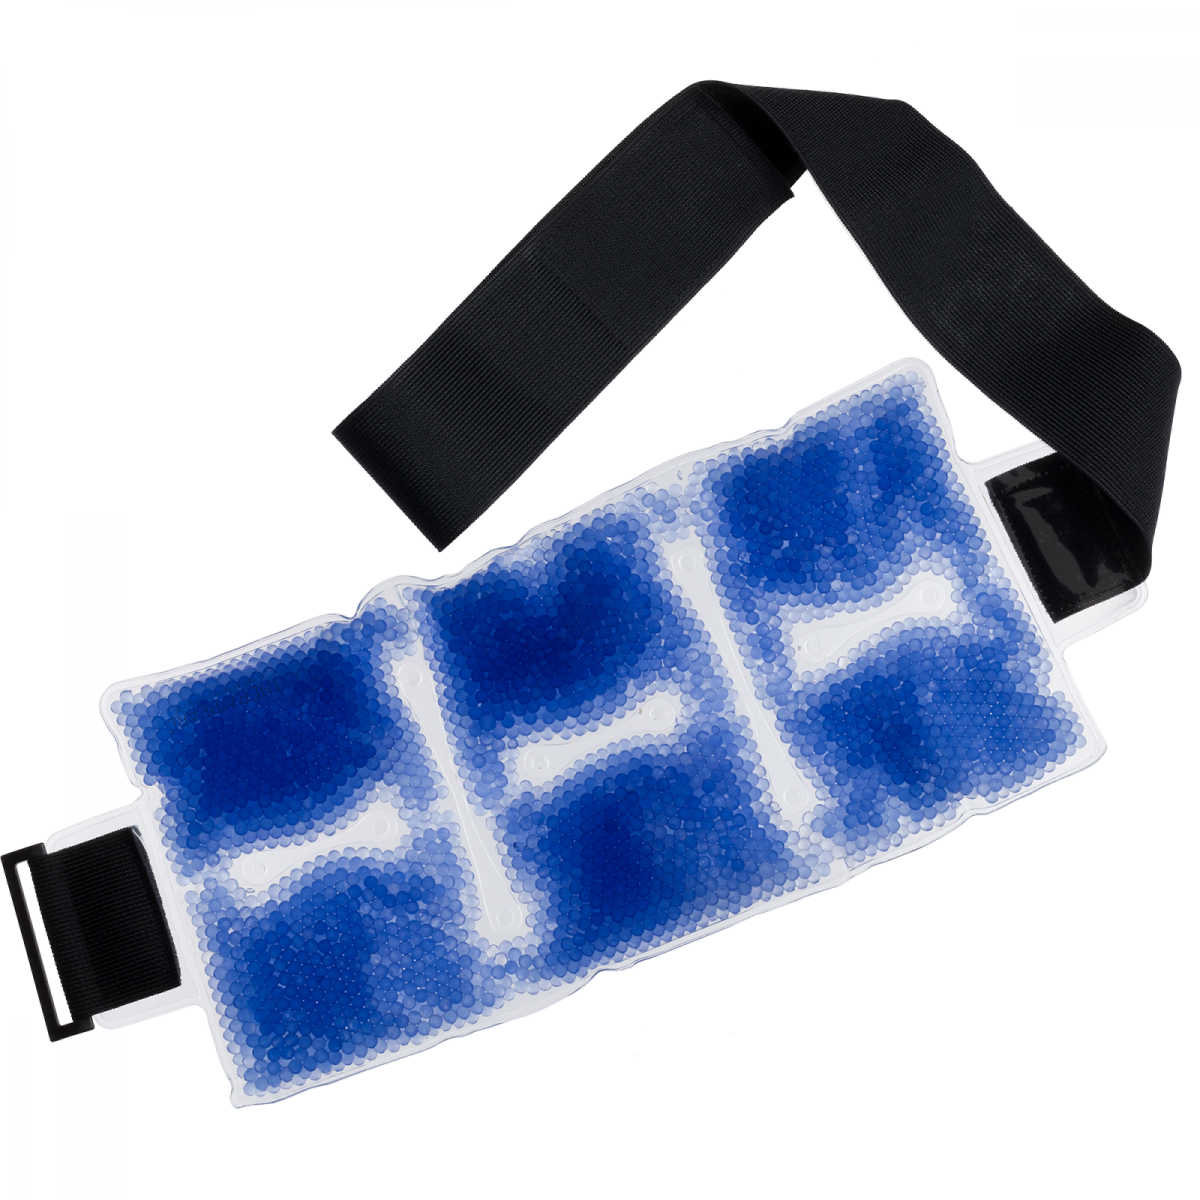
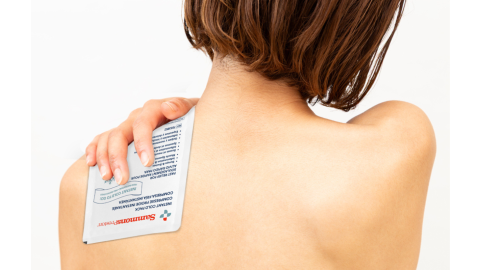
- A reusable Therapearl back wrap or sports pack is great for cool relief and can also be used for heat therapy
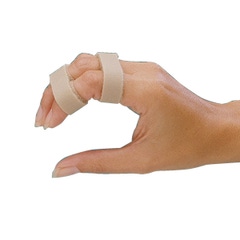
C: Compression is the third step. Wrap the area with an “ACE wrap” type bandage to help prevent swelling. If it’s a finger injury, a finger splint or buddy splint can help offer support, while a back wrap can offer your back support.
E: Elevate the area, so your injured body part is above your heart (if possible)
Prevention
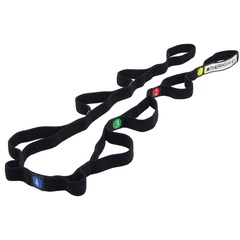
Make sure you properly stretch and warm up before you start playing volleyball. A stretch strap can help you with dynamic stretches.
Avoid overuse injuries by including cross-training and not just sticking to one sport year round. Take a break or play a different sport during the off season.
Talk to your athletic trainer or another medical professional about rehab exercises to restrengthen your muscles as you recover and prevent reinjury.
Injury 4: Knee Injuries (Jumper’s Knee/ACL Tears)
Causes
Jumper’s knee (aka patellar tendonitis) is an overuse injury that causes tears in the patellar (knee) tendon. The repetitive, explosive jumping in volleyball can put a lot of stress on your patellar tendon leading to injury. At some point, approximately half of volleyball players will develop jumper’s knee.1
A less common but serious knee injury that affects volleyball players is an ACL (anterior cruciate ligament) tear. In volleyball, this typically occurs during a cutting maneuver or when an athlete comes down from a jump awkwardly.
Symptoms
Jumper’s knee causes pain that typically occurs where the patellar tendon attaches to your lower kneecap.
Players who experience an ACL tear may hear or feel a pop when the injury occurs. Swelling, pain, and feeling like your knee might “give out” or feel unstable.
Treatment
Jumper’s knee is typically treated using the RICE method (rest, ice, compression, elevation) and rehabilitative exercises. You can learn more about this condition and how to treat it (including instructions for recommended exercises) in this jumper’s knee article.
Most athletes who wish to return to a high demanding sport, like volleyball, have the tear surgically reconstructed.
Prevention
Warming up, cooling down, gradually increasing the intensity of your workouts, and completing exercises that strengthen your knee are a few ways to help prevent knee injuries.
Talk to a medical professional, athletic trainer, or coach for specific exercise suggestions or other prevention tips.
Injury 5: Shoulder Injuries (Rotator Cuff Tendonitis/Shoulder Impingement)
Causes
Overhead serving, spiking, blocking, and other extreme positions and rotations for hitting are all repetitive volleyball movements that can lead to shoulder pain. Overuse can lead to rotator cuff tendonitis, though this is more common in adult players. In younger players, shoulder impingement is more common. It’s the result of your rotator cuff being pinched and compressed shoulder bones (humerus and acromion).
Symptoms
Rotator cuff tendonitis symptoms include pain from the outer arm up to the top of the shoulder. The pain may be worse at night, when reaching behind your back, and when reaching overhead (you may hear a clicking sound during this movement).
One shoulder impingement symptom is pain, the pain may occur in an arc when the shoulder is used between 70 and 120 degrees, when reaching behind your back or overhead, at night, during daily activities, or that radiate down your arm. You may also have a loss of strength in the shoulder.
Because the symptoms are so similar, you should receive a diagnosis from a medical professional to ensure you receive proper treatment and rehabilitation.
Treatment
Rotator cuff tendonitis is usually treated via the R.I.C.E. method (rest, ice, compression, and elevation). You may also be given stretches and exercises to do to help maintain your flexibility.
Shoulder impingement treatment usually starts with rest, medication, and stretching exercises. If symptoms persist, your doctor may require more tests and eventually surgery. If you’re looking for exercises to get started, check out these shoulder impingement rehabilitation exercises.
Prevention
- Warm up and cool down before practices and games.
- Slowly build up your flexibility and strength over time -don’t suddenly increase the intensity of your workout
- Make sure your muscles are balanced (that you exercise your front and back shoulder muscles)
- Have your coach make sure your form is correct during moves that involve your shoulder
Head to Toe Volleyball Injury Recap
If you’re a volleyball player, you love the game. But it can also lead to injuries from head to toe. Hopefully, with these tips, you’ll be able to prevent injuries and stay in the game. But if injuries do occur, you’ll be ready to treat them.
For more volleyball exercises, check out the Volleyball 10 Exercise Series from Performance Health Academy.
References
- Children’s Hospital Colorado. (n.d.). Common Volleyball Injuries in Young Athletes. Retrieved from https://bit.ly/2MF5yzd
- American Orthopaedic Society for Sports Medicine. (2019). Volleyball Injuries. Stop Sports Injuries. Retrieved from https://bit.ly/2ZLfzQD
- World Population Review. (2019). The 200 Largest Cities in the United States by Population 2019. Retrieved from https://bit.ly/2QfjtxS
- Comstock, R. et al. (2019). National High School Sports-Related Surveillance Study. Center for Injury Research and Policy. Retrieved from https://bit.ly/2vAoQQm
- DerSarkissian, C. (2019). Understanding Sprains and Strains -- the Basics. WebMD. Retrieved from https://wb.md/35gfipU
- Mayo Clinic Staff. (2018). Sprained Ankle. Mayo Clinic. Retrieved from https://mayocl.in/2QcJjTh
- Page, P. (2010). Balance exercises for chronic ankle sprains effective. Performance Health Academy. Retrieved from https://bit.ly/2QvHdwQ
- Bhandari, S. (2019). Concussion (Traumatic Brain Injury). WebMD. Retrieved from https://wb.md/2QDnE5B
- Moore, R. (2016). The 6 Elements of Concussion Management. Performance Health Academy. Retrieved from https://bit.ly/2ZEenOW
- Koutures, C. (2018). Concussions: Prevention strategies from USA Volleyball’s Dr. Chris Koutures. Volleyball Mag. Retrieved from https://bit.ly/2tfCTtN
- Medline Plus. (2019). Strains and Sprains. U.S. National Library of Medicine. Retrieved from https://bit.ly/35bOYxo
- Children’s Hospital Colorado. (n.d.). Anterior Cruciate Ligament (ACL) Injury. Retrieved from https://bit.ly/2Qc1rwI
- Garving, C., Jakob, S., Bauer, I., Nadjar, R., & Brunner, U. H. (2017). Impingement Syndrome of the Shoulder. Deutsches Arzteblatt international. Retrieved from https://bit.ly/37oh5ut
- Cleveland Clinic. (n.d.). Rotator Cuff Tendonitis. Retrieved from https://cle.clinic/36dEaQF
- Sole, C.J., Kavanaugh, A.A., & Stone, M.H. (2017). Injuries in Collegiate Women’s Volleyball: A Four-Year Retrospective Analysis. Retrieved from https://bit.ly/2T5wZ9t
Medical Disclaimer: The information provided on this site, including text, graphics, images and other material, are for informational purposes only and are not intended to substitute for professional medical advice, diagnosis or treatment. Always seek the advice of your physician or other healthcare professional with any questions or concerns you may have regarding your condition.
Volleyball is one of the most popular sports in the world. It has the second highest participation rate worldwide (after soccer) and two Olympic events (beach and indoor).1 Over 460,000 U.S. high school students participate each year (that’s more than the population of Virginia Beach, VA) and more than 410,000 of those students are girls (more than the population of Tampa, FL).2,3
With so many participants, it’s no surprise that a study done by the Center for Injury Research and Policy estimates there are 58,127 female U.S. high school volleyball player injuries each year.4 If each injury occurred in an individual volleyball player, that would mean ~14% of all female volleyball players are injured each year. The good news is there are ways to treat and prevent these injuries.
Get the facts and learn how to treat and prevent volleyball injuries so you can stay in the game!
The Top 10 Most Common Volleyball Injuries
Volleyball Injury Statistics
Learn How to Treat and Prevent 5 Common Volleyball Injuries
Injury 1: Ankle Sprains and Strains
Injury 2: Concussions
Injury 3: Other Sprains/Strains (Trunk, Hip, Thigh, Finger...)
Injury 4: Knee Injuries (Jumper’s Knee/ACL Tears)
Injury 5: Shoulder Injuries (Rotator Cuff Tendonitis/Shoulder Impingement)
The Top 10 Most Common Volleyball Injuries
According to a research study done by Center for Injury Research and Policy, the ten most common high school volleyball injury diagnoses in during the 2018-19 school year were:4
- Ankle Sprain/Strain (23.6%)
- Concussion (15.3%)
- Hand/Wrist Sprain/Strain (9.8%)
- Shoulder Other (6.6%)
- Knee Sprain/Strain (6.3%)
- Trunk Sprain/Strain (5.1%)
- Shoulder Sprain/Strain (5%)
- Knee Other (4.4%)
- Hand/Wrist Fracture (4.3%)
- Hand/Wrist Other (2.2%)
A 2017 study on injuries in collegiate women’s volleyball did a four-year retrospective analysis of injury data from on 20 athletes and found similar results. The knee, shoulder, and ankle were the most frequently injured body areas.15
Volleyball Injury Statistics
Learn more about volleyball injury statistics from these infographics!


Learn How to Treat and Prevent 5 Common Volleyball Injuries
Injury 1: Ankle Sprains and Strains
Causes
Ankle sprains and strain are the most common injury in volleyball, making up 23.6% of volleyball injuries.4 They often occur at the net when an opposing player lands on another player’s foot. A sprain occurs if the ligament is stretched or torn while a strain occurs if a tendon or muscle tissue is stretched or torn. Both can lead to a painful injury.
Symptoms
Sprained/strained ankle symptoms may include:
- Pain or tenderness
- Bruising
- Swelling
- Limited range of motion
- Ankle instability
- A popping sound at the time of injury
Treatment
Have a medical professional, like a certified athletic trainer or doctor evaluate your ankle to ensure you don’t have a more serious injury. Then follow the R.I.C.E. method during your recovery.
Rest: Rest and avoid putting weight on your ankle for the first 24-48 hours.
Ice: Ice your ankle for 15-20 minutes every 2-3 hours to reduce pain and swelling. Reusable ankle wraps are a mess-free solution. Use two so one can chill while you use the other.
Compression: Wrap your injury to help prevent swelling.
Elevation: Raise your ankle above the level of your heart. Lie down and prop it up on pillows or a wedge cushion.
After the acute inflammation and swelling has gone down, you can use an ankle brace or kinesiology tape to give your ankle support as it continues to heal.
How to Apply Kinesiology Tape To A Sprained Ankle
Prevention
To prevent a recurrence, make sure you exercise your ankle. Studies have found that progressive balance exercise programs are effective at reducing ankle sprain reoccurence.7 A TheraBand Stability Disc is an excellent tool for balance training. Get started with 1-leg balanceankle flexion ROM, and stepping exercises.
And be proactive about preventing another ankle sprain during your volleyball practices or games by either taping your ankle as shown in the video above or wearing an ankle brace.
Front row players are more susceptible to ankle injuries due to lateral movements, jumps, and under-the-net contact. A more rigid brace like the Active Ankle T2 offers needed support. Back row players still need support, but they also need more mobility for digging and diving. The Active Ankle AS1 Pro might be a better choice. If you have strong ankles, don’t like the feel of a brace, or have never worn one before the Active Ankle 329 Sleeve still offers support but may be more comfortable for you.
Learn more about ankle sprain guidelines from Phil Page, PhD, PT, ATC, CSCS, FACSM, LAT
Injury 2: Concussions
Causes
Concussions made up over 15% of all volleyball injuries in the study done by the Center for Injury Research and Policy.4 Concussions are caused by a blow or bump to the head. In volleyball this may be from a ball, another player, or a piece of equipment like the net poles.
The brain is soft tissue, cushioned by spinal fluid, within the skull. A blow to the head can jolt your brain, literally moving it around, causing bruising or damage to blood vessels or nerves that result in a concussion.
Symptoms
Symptoms of a concussion may include:
- Dizziness/Balancing problems
- Headache
- Nausea
- Confusion
- Clumsiness
- Slurred speech
- Blurred vision
- Sensitivity to light and/or noise
- Ringing in ears
- Sluggishness
- Concentration difficulties
- Memory loss
- Behavior or personality changes
Grades of Concussion
Concussions come in three grades of severity. A medical professional can help determine the severity of your concussion.
- Grade 1: Mild, no loss of consciousness, symptoms last less than 15 minutes
- Grade 2: Moderate, no loss of consciousness, symptoms last more than 15 minutes
- Grade 3: Severe, loss of consciousness (even if it only lasts a few seconds)
Treatment
Seek medical attention immediately if you believe you may have a concussion. Follow your doctor’s specific instructions. Six common steps for concussion management include:
- Cognitive Rest
- Avoid activities like texting, video games, television, computer use, and schoolwork that require a lot of concentration and attention.
- Physical Rest
- Avoid physical activity that exacerbates your symptoms, including anaerobic exercises, weight lifting, household chores, and other activities.
- Medication/Intervention
- Your doctor may recommend taking medication to relieve specific concussion symptoms
- Noise cancelling headphones or ear plugs can help reduce phonophobia from loud noises
- Sunglasses can help reduce photophobia due to bright lights or sunlight
- Transition Back to School
- Alert school personnel and teachers
- Teachers may want to consider offering forgiveness of missed assignments, rest breaks, decreased schoolwork, distraction-free work areas, a notetaker, and/or more time to complete tests and homework
- Avoid standardized tests during recovery
- Monitor 2-3 months post-concussion for scholastic difficulties
- Graded Return to Play
- Return to play should not occur until after a rest period, symptom resolution, and a doctor’s permission. Each of the following steps toward returning to play should take at least 24 hours.
- Non-impact aerobic exercise
- Sport-specific exercise (non-impact)
- Non-contact training drills
- Full contact practice
- Return to normal play
- Athletes should be symptom-free and medication-free before starting the return-to-play protocol
- If symptoms develop, the activity should be stopped immediately. 24 hours after the symptoms resolve, athletes can resume at the last step where they were asymptomatic.
- Return to play should not occur until after a rest period, symptom resolution, and a doctor’s permission. Each of the following steps toward returning to play should take at least 24 hours.
- Considerations for Higher Risk Players
- Players with more than 3 symptoms, history of concussion, under the age of 18, loss of consciousness for more than 60 seconds, headache for longer than 60 hours, amnesia, comorbid conditions, medication use, etc. may be considered high risk.
- These athletes should receive a multidisciplinary approach (like formal neuropsychological testing, a referral to a healthcare professional experienced in concussion management, and extensive communication with the coach and training staff)
Learn more about concussion management from Dr. Greg Stewart in this video.
Prevention
While concussions are most common during competition, you can reduce your risk of concussion during practice by following these steps:
- Make sure all practice sessions and scrimmages are supervised by your coach
- Reduce the number of free balls in the air during serving drills and hitting lines
- Never turn your back to a server or hitter (including during huddles)
- During practice, make sure everyone serves and hits in one direction, then shag (collect) all of the balls, then serve and hit in the opposite direction
- Shag for your opponents during warmups so no one has to go under the net or turn their backs to an incoming ball
- Always call before hitting/serving
- Ideally have only one ball in play for each defensive player and make sure they are aware of incoming balls
- Make sure anyone chasing/picking up loose balls around the court is aware of incoming balls
Injury 3: Other Sprains/Strains (Trunk, Hip, Thigh, Finger...)
Sprain vs. Strain
Sprains and strains can both leave you in pain, but they are different injuries. A sprain is caused by the stretching or tearing of ligaments (fibrous bands of tissue that connect bones at the joint). While a strain or “pulled muscle” is caused by the stretching or tearing of a tendon or muscle tissue.
Causes
Anything that puts sudden or unaccustomed stress on your joints or muscles can a sprain/strain. Overuse can also lead to stretching, irritation, or inflammation of your ligaments or muscles.
In volleyball specifically, trunk sprains can be caused by repetitive bending or rotating of your trunk. Finger sprains are commonly caused by setting or blocking. Other common finger injuries include dislocations and tendon tears.
Symptoms
Symptoms of sprains and strains may include:
- Pain
- Swelling
- Bruising
- Muscle spasms
- Trouble moving the joint/muscle
Treatment
A medical professional can help determine if your injury is a sprain, a strain, or a more serious injury. Treatment of sprains and strains typically involve the R.I.C.E. treatment.
R: Rest and avoid putting stress on your injured body part for 24-48 hours
I: Ice the area to reduce pain and inflammation
- A reusable Therapearl back wrap or sports pack is great for cool relief and can also be used for heat therapy
C: Compression is the third step. Wrap the area with a “ACE wrap” type bandage to help prevent swelling. If it’s a finger injury, a finger splint or buddy splint can help offer support, while a back wrap can offer your back support.
E: Elevate the area, so your injured body part is above your heart (if possible)
Prevention
Make sure you properly stretch and warm up before you start playing volleyball. A stretch strap can help you with dynamic stretches.
Avoid overuse injuries by including cross-training and not just sticking to one sport year round. Take a break or play a different sport during the off season.
Talk to your athletic trainer or another medical professional about rehab exercises to restrengthen your muscles as you recover and prevent reinjury.
Injury 4: Knee Injuries (Jumper’s Knee/ACL Tears)
Causes
Jumper’s knee (aka patellar tendonitis) is an overuse injury that causes tears in the patellar (knee) tendon. The repetitive, explosive jumping in volleyball can put a lot of stress on your patellar tendon leading to injury. At some point, approximately half of volleyball players will develop jumper’s knee.1
A less common but serious knee injury that affects volleyball players is an ACL (anterior cruciate ligaments) tear. In volleyball, this typically occurs during a cutting maneuver or when an athlete comes down from a jump awkwardly.
Symptoms
Jumper’s knee causes pain that typically occurs where the patellar tendon attaches to your lower kneecap.
Players who experience an ACL tear may hear or feel a pop when the injury occurs. Swelling, pain, and feeling like your knee might “give out” or feel unstable.
Treatment
Jumper’s knee is typically treated using the RICE method (rest, ice, compression, elevation) and rehabilitative exercises. You can learn more about this condition and how to treat it (including instructions for recommended exercises) in this jumper’s knee article.
Most athletes who wish to return to a high demanding sport, like volleyball, have the tear surgically reconstructed.
Prevention
Warming up, cooling down, gradually increasing the intensity of your workouts, and completing exercises that strengthen your knee are a few ways to help prevent knee injuries.
Talk to a medical professional, athletic trainer, or coach for specific exercise suggestions or other prevention tips.
Injury 5: Shoulder Injuries (Rotator Cuff Tendonitis/Shoulder Impingement)
Causes
Overhead serving, spiking, blocking, and other extreme positions and rotations for hitting are all repetitive volleyball movements that can lead to shoulder pain. Overuse can lead to rotator cuff tendonitis, though this is more common in adult players. In younger players, shoulder impingement is more common. It’s the result of your rotator cuff being pinched and compressed shoulder bones (humerus and acromion).
Symptoms
Rotator cuff tendonitis symptoms include pain from the outer arm up to the top of the shoulder. The pain may be worse at night, when reaching behind your back, and when reaching overhead (you may hear a clicking sound during this movement).
One shoulder impingement symptom is pain, the pain may occur in an arc when the shoulder is used between 70 and 120 degrees, when reaching behind your back or overhead, at night, during daily activities, or that radiate down your arm. You may also have a loss of strength in the shoulder.
Because the symptoms are so similar, you should receive a diagnosis from a medical professional to ensure you receive proper treatment and rehabilitation.
Treatment
Rotator cuff tendonitis is usually treated via the R.I.C.E. method (rest, ice, compression, and elevation). You may also be given stretches and exercises to do to help maintain your flexibility.
Shoulder impingement treatment usually starts with rest, medication, and stretching exercises. If symptoms persist, your doctor may require more tests and eventually surgery. If you’re looking for exercises to get started, check out these shoulder impingement rehabilitation exercises.
Prevention
- Warm up and cool down before practices and games.
- Slowly build up your flexibility and strength over time -don’t suddenly increase the intensity of your workout
- Make sure your muscles are balanced (that you exercise your front and back shoulder muscles)
- Have your coach make sure your form is correct during moves that involve your shoulder
Head to Toe Volleyball Injury Recap
If you’re a volleyball player, you love the game. But it can also lead to injuries from head to toe. Hopefully with these tips you’ll be able to prevent injuries and stay in the game. But if injuries do occur, you’ll be ready to treat them.
For more volleyball exercises, check out the Volleyball 10 Exercise Series from Performance Health Academy.
References
- Children’s Hospital Colorado. (n.d.). Common Volleyball Injuries in Young Athletes. Retrieved from https://bit.ly/2MF5yzd
- American Orthopaedic Society for Sports Medicine. (2019). Volleyball Injuries. Stop Sports Injuries. Retrieved from https://bit.ly/2ZLfzQD
- World Population Review. (2019). The 200 Largest Cities in the United States by Population 2019. Retrieved from https://bit.ly/2QfjtxS
- Comstock, R. et al. (2019). National High School Sports-Related Surveillance Study. Center for Injury Research and Policy. Retrieved from https://bit.ly/2vAoQQm
- DerSarkissian, C. (2019). Understanding Sprains and Strains -- the Basics. WebMD. Retrieved from https://wb.md/35gfipU
- Mayo Clinic Staff. (2018). Sprained Ankle. Mayo Clinic. Retrieved from https://mayocl.in/2QcJjTh
- Page, P. (2010). Balance exercises for chronic ankle sprains effective. Performance Health Academy. Retrieved from https://bit.ly/2QvHdwQ
- Bhandari, S. (2019). Concussion (Traumatic Brain Injury). WebMD. Retrieved from https://wb.md/2QDnE5B
- Moore, R. (2016). The 6 Elements of Concussion Management. Performance Health Academy. Retrieved from https://bit.ly/2ZEenOW
- Koutures, C. (2018). Concussions: Prevention strategies from USA Volleyball’s Dr. Chris Koutures. Volleyball Mag. Retrieved from https://bit.ly/2tfCTtN
- Medline Plus. (2019). Strains and Sprains. U.S. National Library of Medicine. Retrieved from https://bit.ly/35bOYxo
- Children’s Hospital Colorado. (n.d.). Anterior Cruciate Ligament (ACL) Injury. Retrieved from https://bit.ly/2Qc1rwI
- Garving, C., Jakob, S., Bauer, I., Nadjar, R., & Brunner, U. H. (2017). Impingement Syndrome of the Shoulder. Deutsches Arzteblatt international. Retrieved from https://bit.ly/37oh5ut
- Cleveland Clinic. (n.d.). Rotator Cuff Tendonitis. Retrieved from https://cle.clinic/36dEaQF
- Sole, C.J., Kavanaugh, A.A., & Stone, M.H. (2017). Injuries in Collegiate Women’s Volleyball: A Four-Year Retrospective Analysis. Retrieved from https://bit.ly/2T5wZ9t
Medical Disclaimer: The information provided on this site, including text, graphics, images and other material, are for informational purposes only and are not intended to substitute for professional medical advice, diagnosis or treatment. Always seek the advice of your physician or other healthcare professional with any questions or concerns you may have regarding your condition.




 France
 Australia