France
 Australia
Key Takeaways
- Volleyball requires a lot of movement from your shoulder joint, whether you're serving, setting, passing or hitting
- Strong leg muscles give you the power you need to elevate your jumps for effective setting, hitting and blocking
- Remember to make time for strength training and stretching as it can prevent injuries and enhance your performance
- If you’re suffering from injuries or muscle soreness, here are 5 products that can help relieve the pain and get you back on the court
Top Products in This Article


Volleyball players require a high level of stamina and endurance to compete on the court. If you want to concentrate on building your volleyball muscles and improving your flexibility in the necessary joints, you'll benefit from a program that focuses on full-body flexibility and strength.
Start volleyball conditioning today with these 9 exercises that work the full body!
- What Muscles Do I Train?
- 9 Exercises to Get You Started
- Common Volleyball Drills to Practice
- 5 Products to Help Relieve Pain
What Muscles Do I Train?
Jumping and running, as well as serving and hitting the ball, all require strong muscles and flexible joints. Most volleyball strength training exercises should use the entire range of motion of major joints including the hips, shoulders, knees, and ankles. These muscles play a vital role in explosive movements such as quickly approaching the net, jumping high, and hitting hard.
Strengthening major muscle groups can also help prevent injuries on the court. The most common injuries of volleyball players occur at the knees, low back, and shoulders. Learn which muscles you should train prior to exercise!
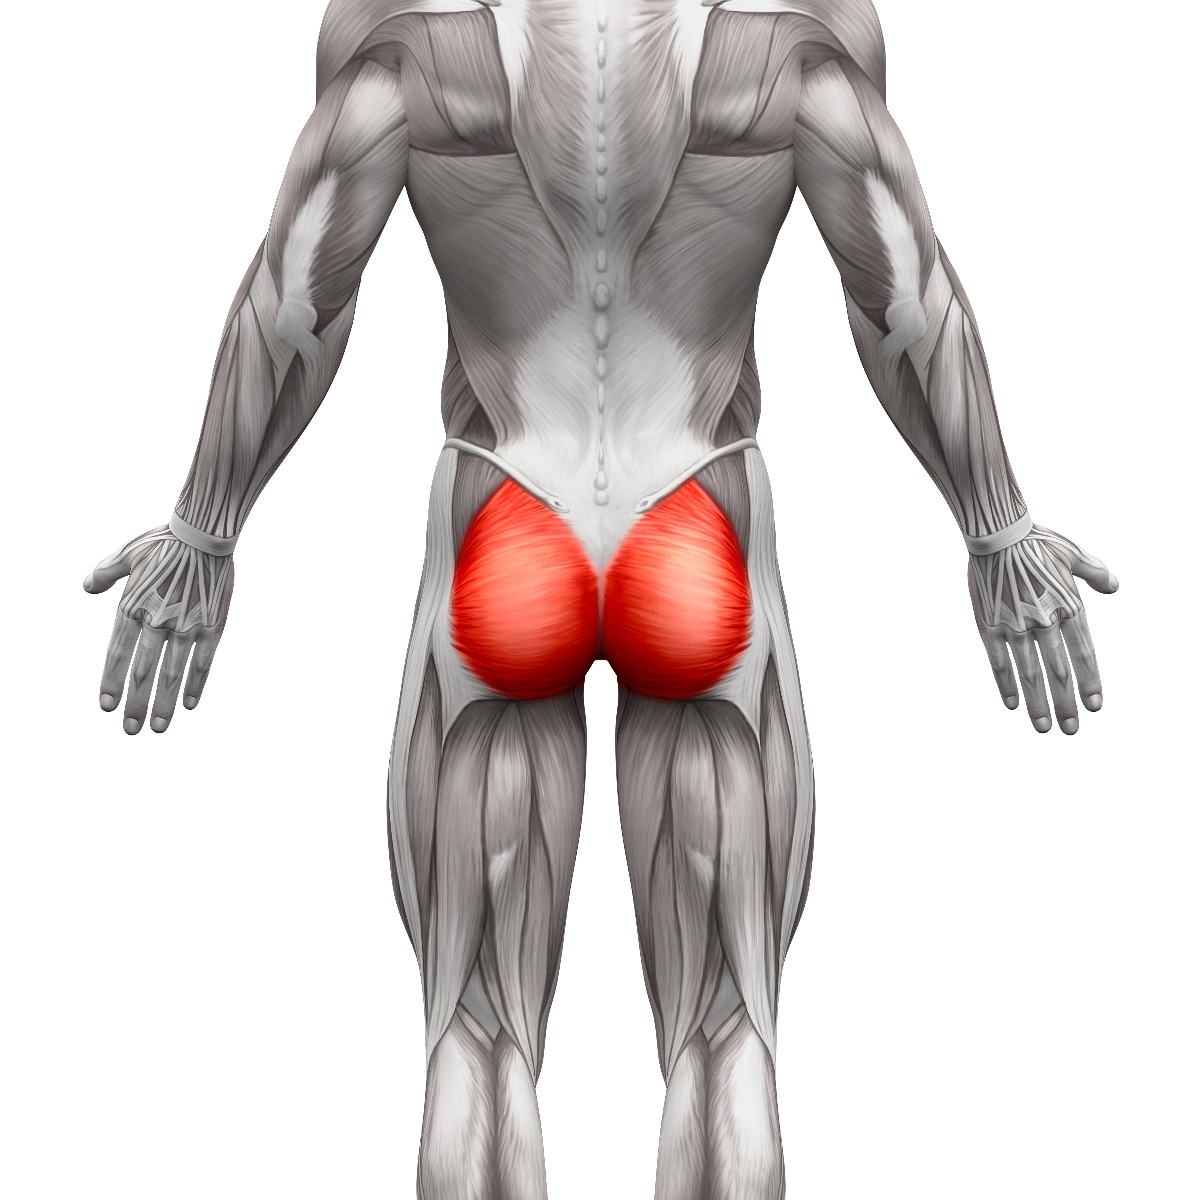
Glutes and Hamstrings
When passing or blocking, the muscles you’ll use are the hamstrings, glutes, hip flexors, and quadriceps. Weak gluteal muscles will slow you down and prevent you from jumping high. Exercising the glutes and hamstrings will lead to greater strength and power. There are lots of exercises that you can use to activate and strengthen the muscles around your hips. Deadlifts are a great total body exercise that work hip extension power!
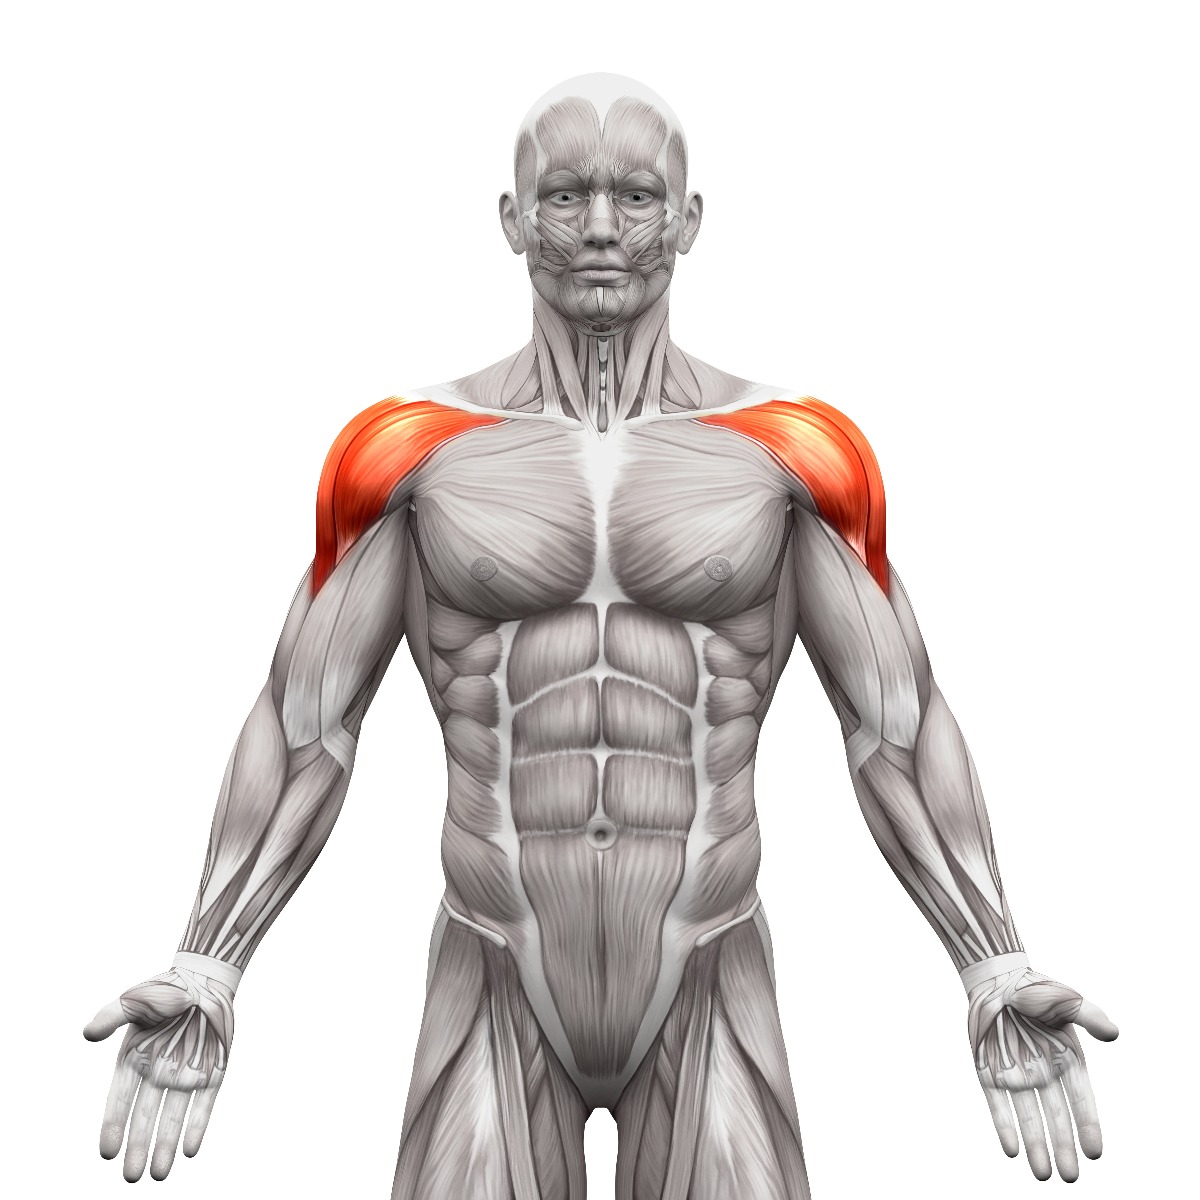
Shoulders
If you want to learn how to hit harder, you will need to focus on strengthening and protecting your shoulder joints and all the muscles around it. The backside of the shoulder absorbs much of the impact from hitting. It also provides much of the force in decelerating the arm after a swing. All that trauma in one area often leads to an imbalanced shoulder.
When serving or setting, the latissimus dorsi muscles, which run down your back from just below the shoulder blades to your waist, are useful for stabilizing in addition to moving your upper body. Your biceps and forearms also engage to move your arms.
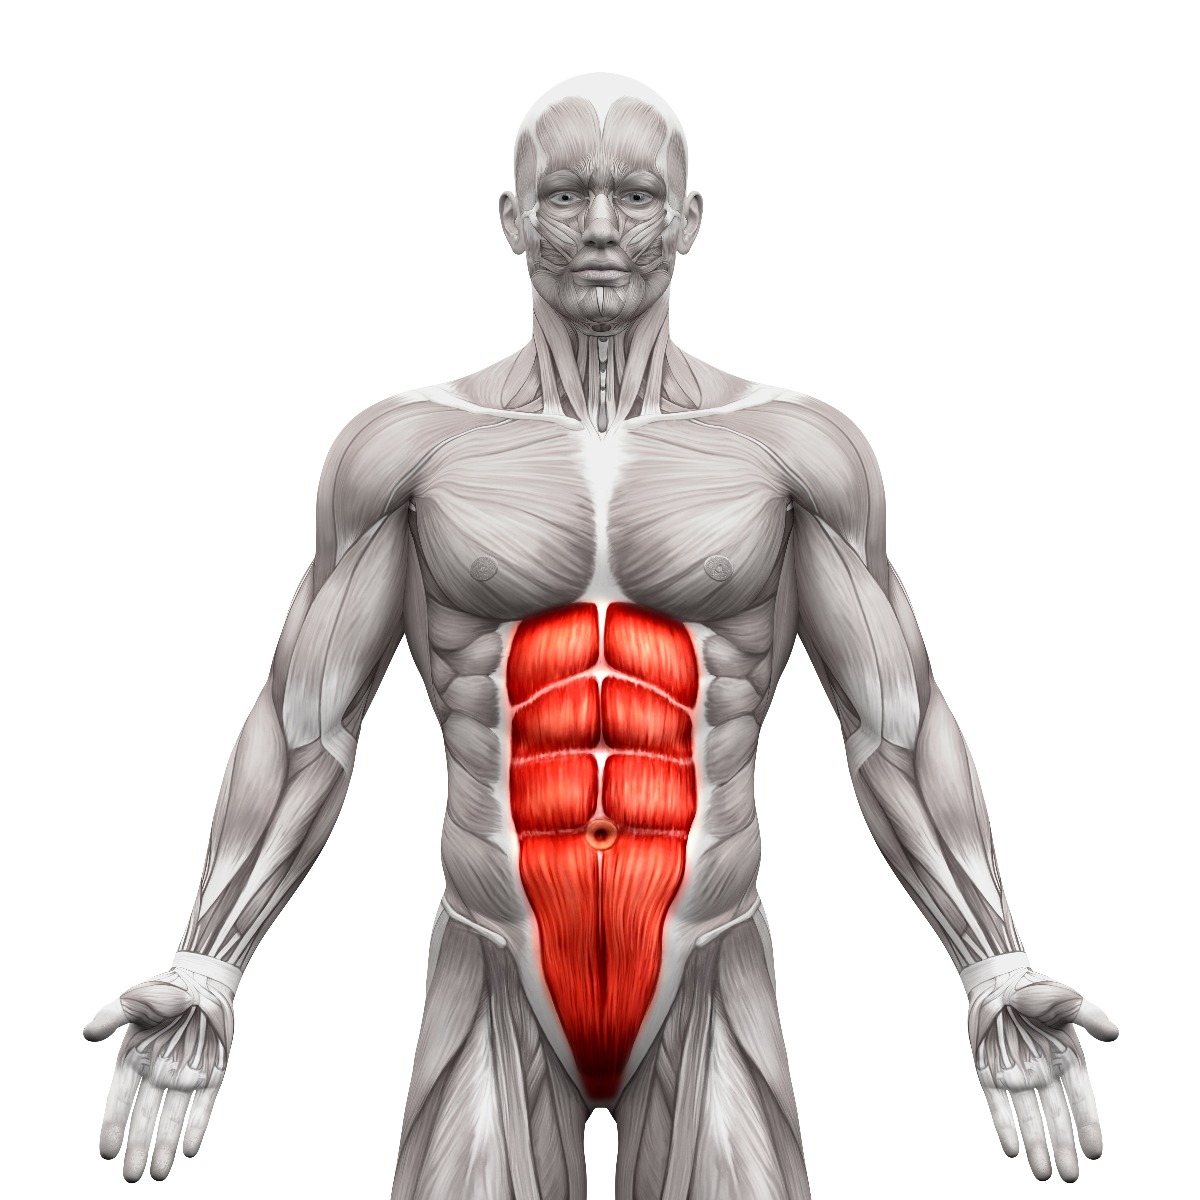
Abdominal Muscles
A strong core is not only a necessity to play volleyball at your best level but it's important to protect the spine. The more you develop your core, the stronger you’ll be with all volleyball movements, especially those when your arms and hands are outside of your body line. Proper planks require glutes, quads, and anterior abs to be stiff and contracted.
9 Exercises to Get You Started
Conditioning plays an important role in a player's ability to develop and enhance various skills. Specific areas, as mentioned earlier in this article can be worked on before tryouts to prepare you for your best performance. Use these 9 exercises to help you get started! For optimal strength training, try using resistive exercise products to perform these movements.
Lunges with Twist

- Stand with feet about shoulder-width apart.
- With your right foot, step forward into a lunge position. As you bend your knee, be sure to keep your knee over your right foot.
- From your midsection, twist your upper body to the right. Keep your core engaged and squeeze your glutes.
- Reach across your right side with your arms outstretched.
- In a slow, controlled movement, bring your arms back to the center. Step the right foot back and return to your starting position. Switch and step forward with your left foot.
You can also hold a weight in your hands as you twist to either side during this lunge.
Deadlift with Resistance Band
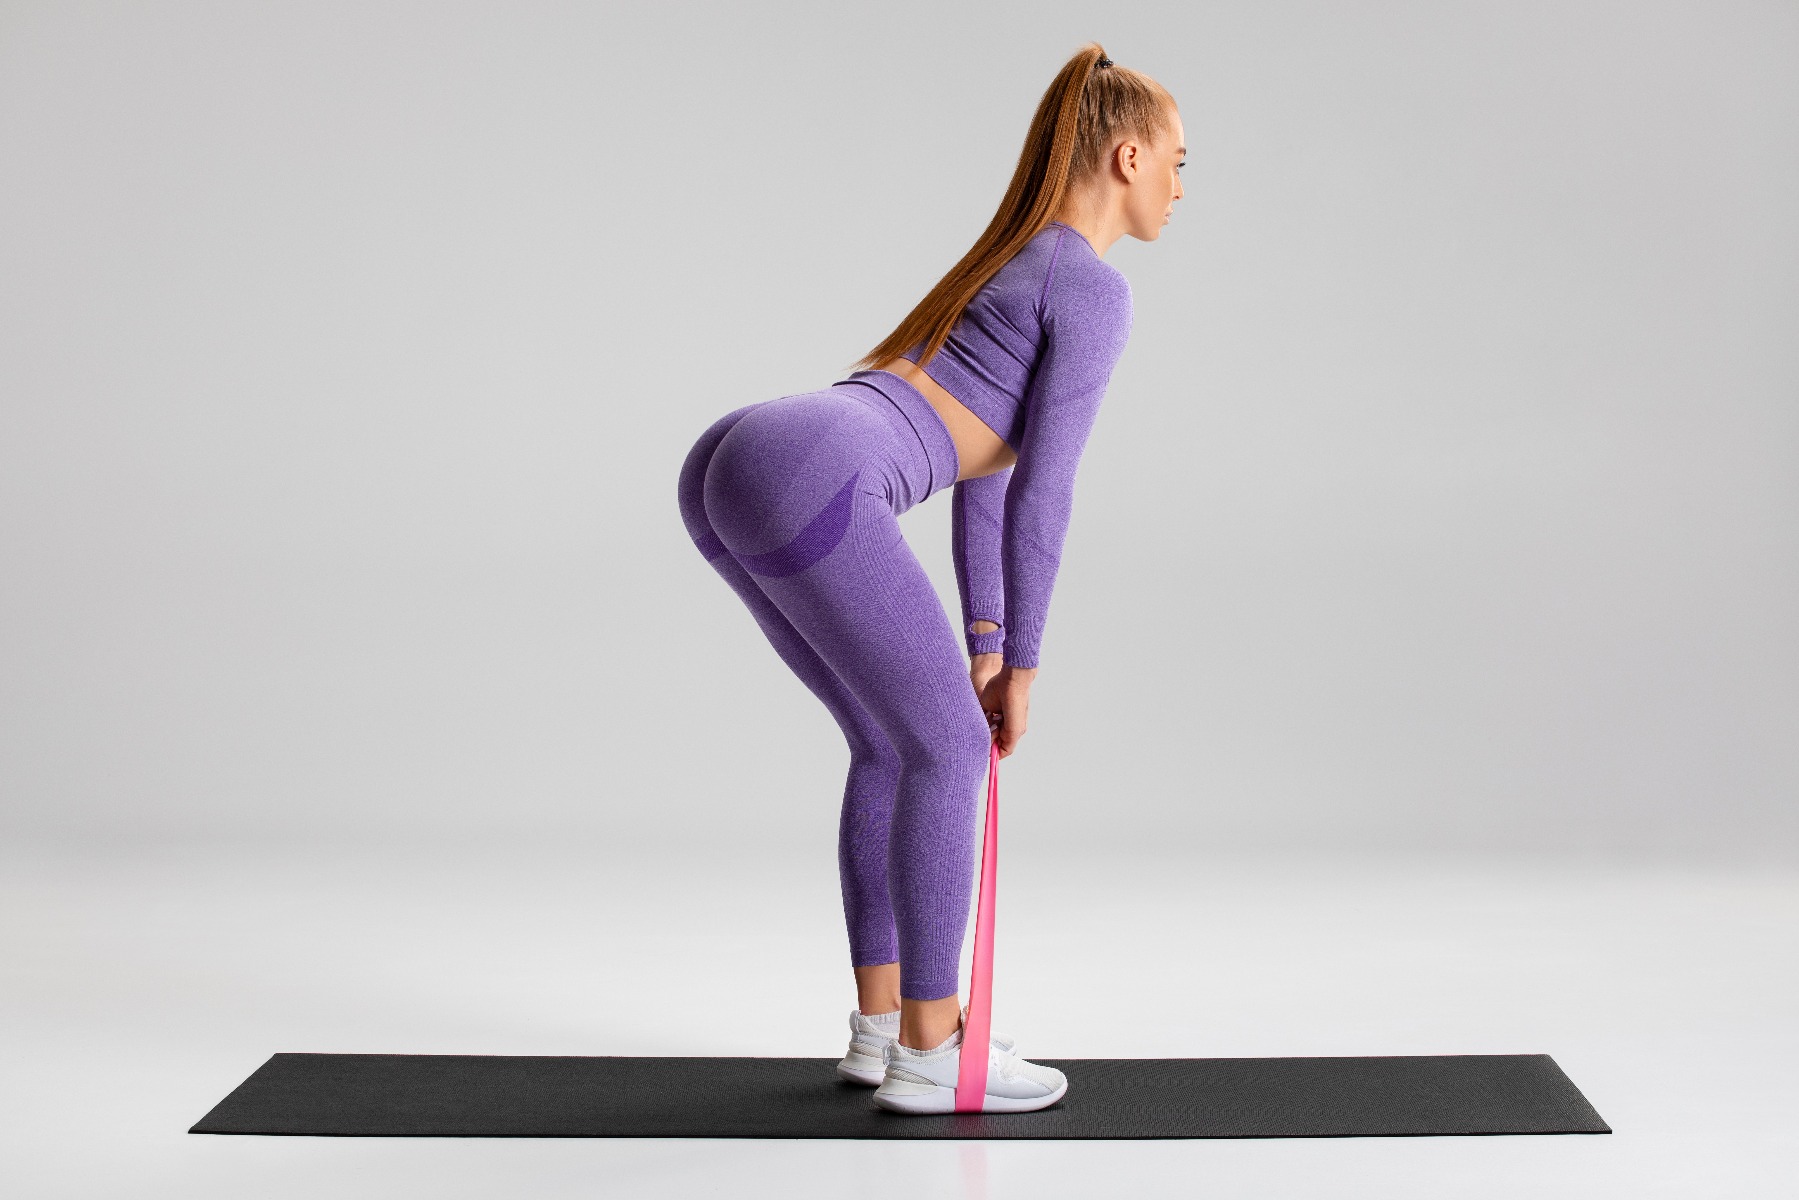
- Hold the end of the resistance band in each hand and step on to the middle. Place your feet at shoulder-width with toes pointing forward.
- Bend your knees slightly and drive your hips back but do not go lower than your knees. Keep the chest up. This is the starting position.
- Forcefully contract your glutes, driving them forward as you rise to standing. Pause then return to the starting position.
Squat Jumps
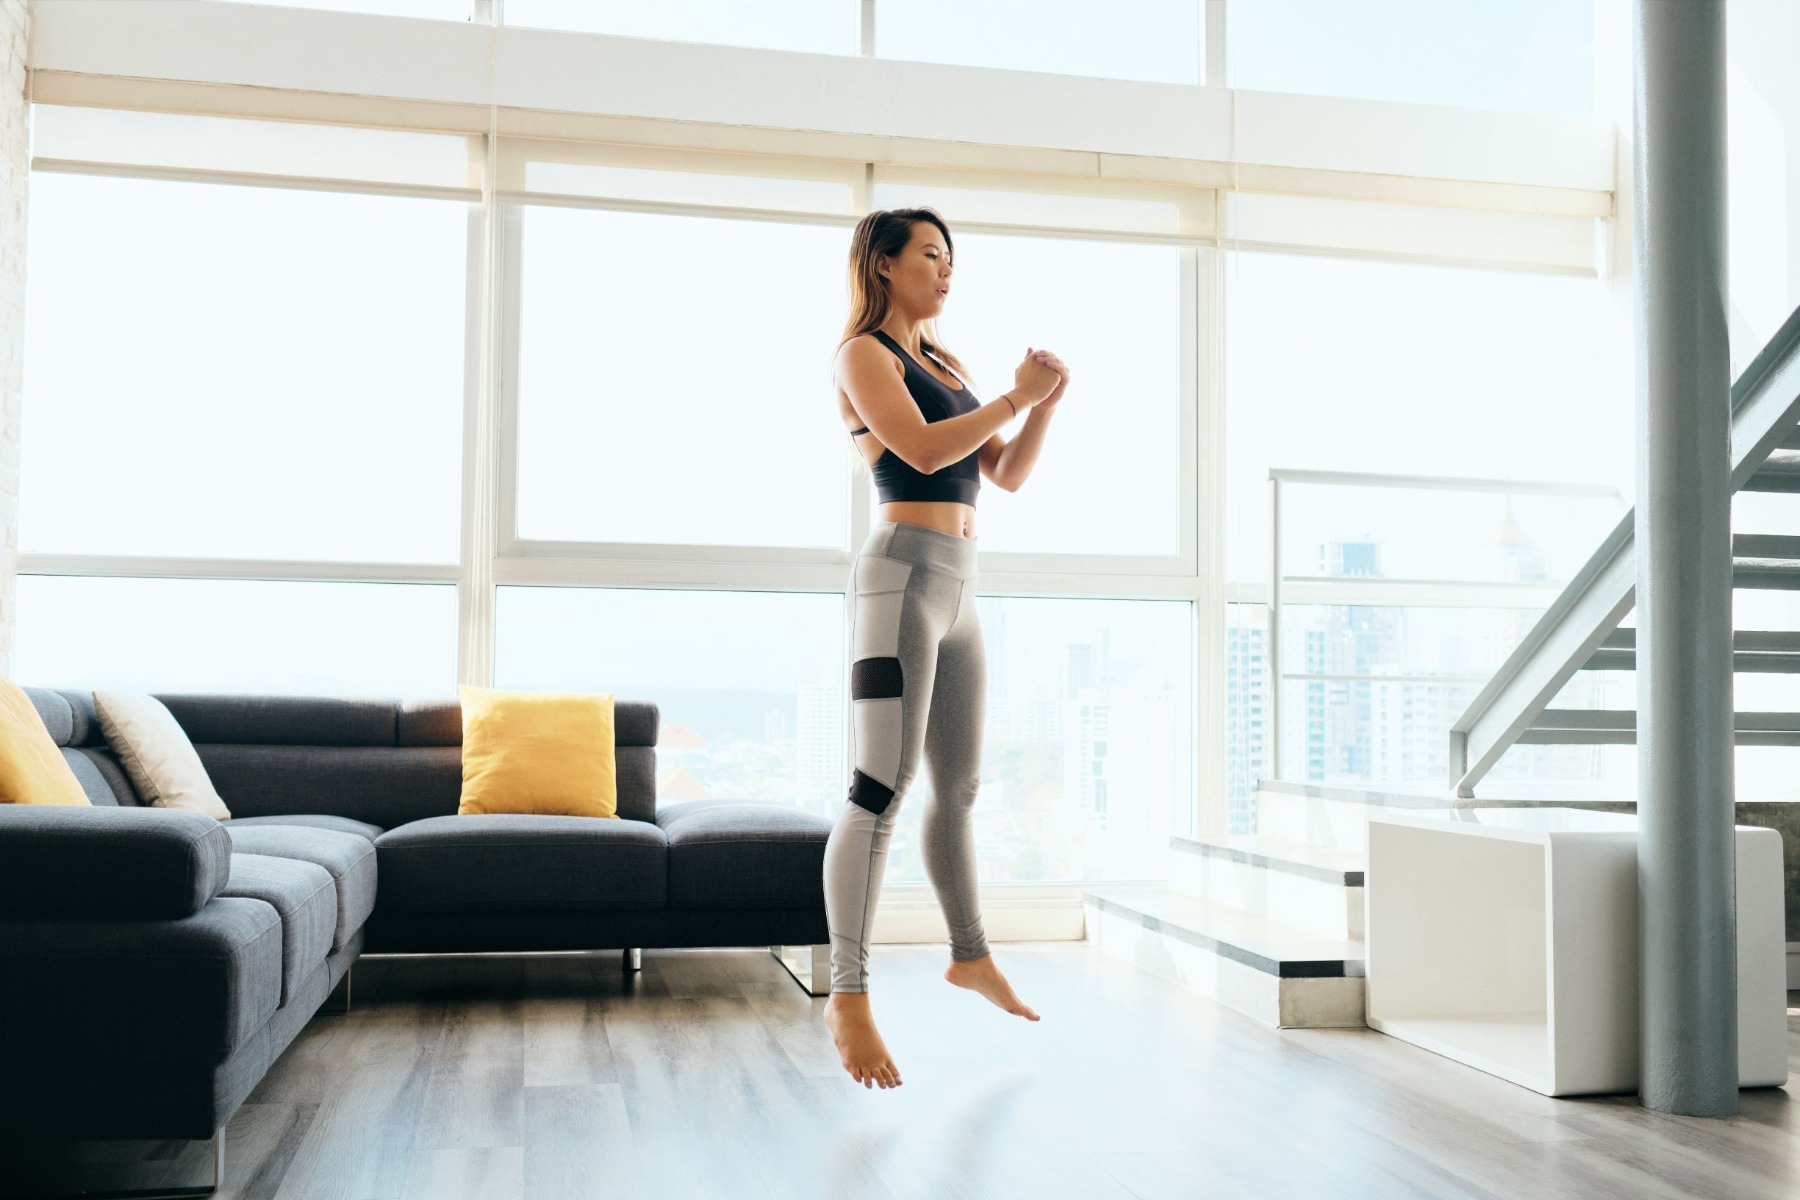
- Stand with your feet shoulder-width apart, toes turned slightly out.
- Lower into a squat, with your weight in your heels.
- When you hit the bottom of your squat, drive hard through your legs and heels as you launch straight up.
- Land softly, then use the momentum from landing to go right into your next squat.
Lateral Side Raise
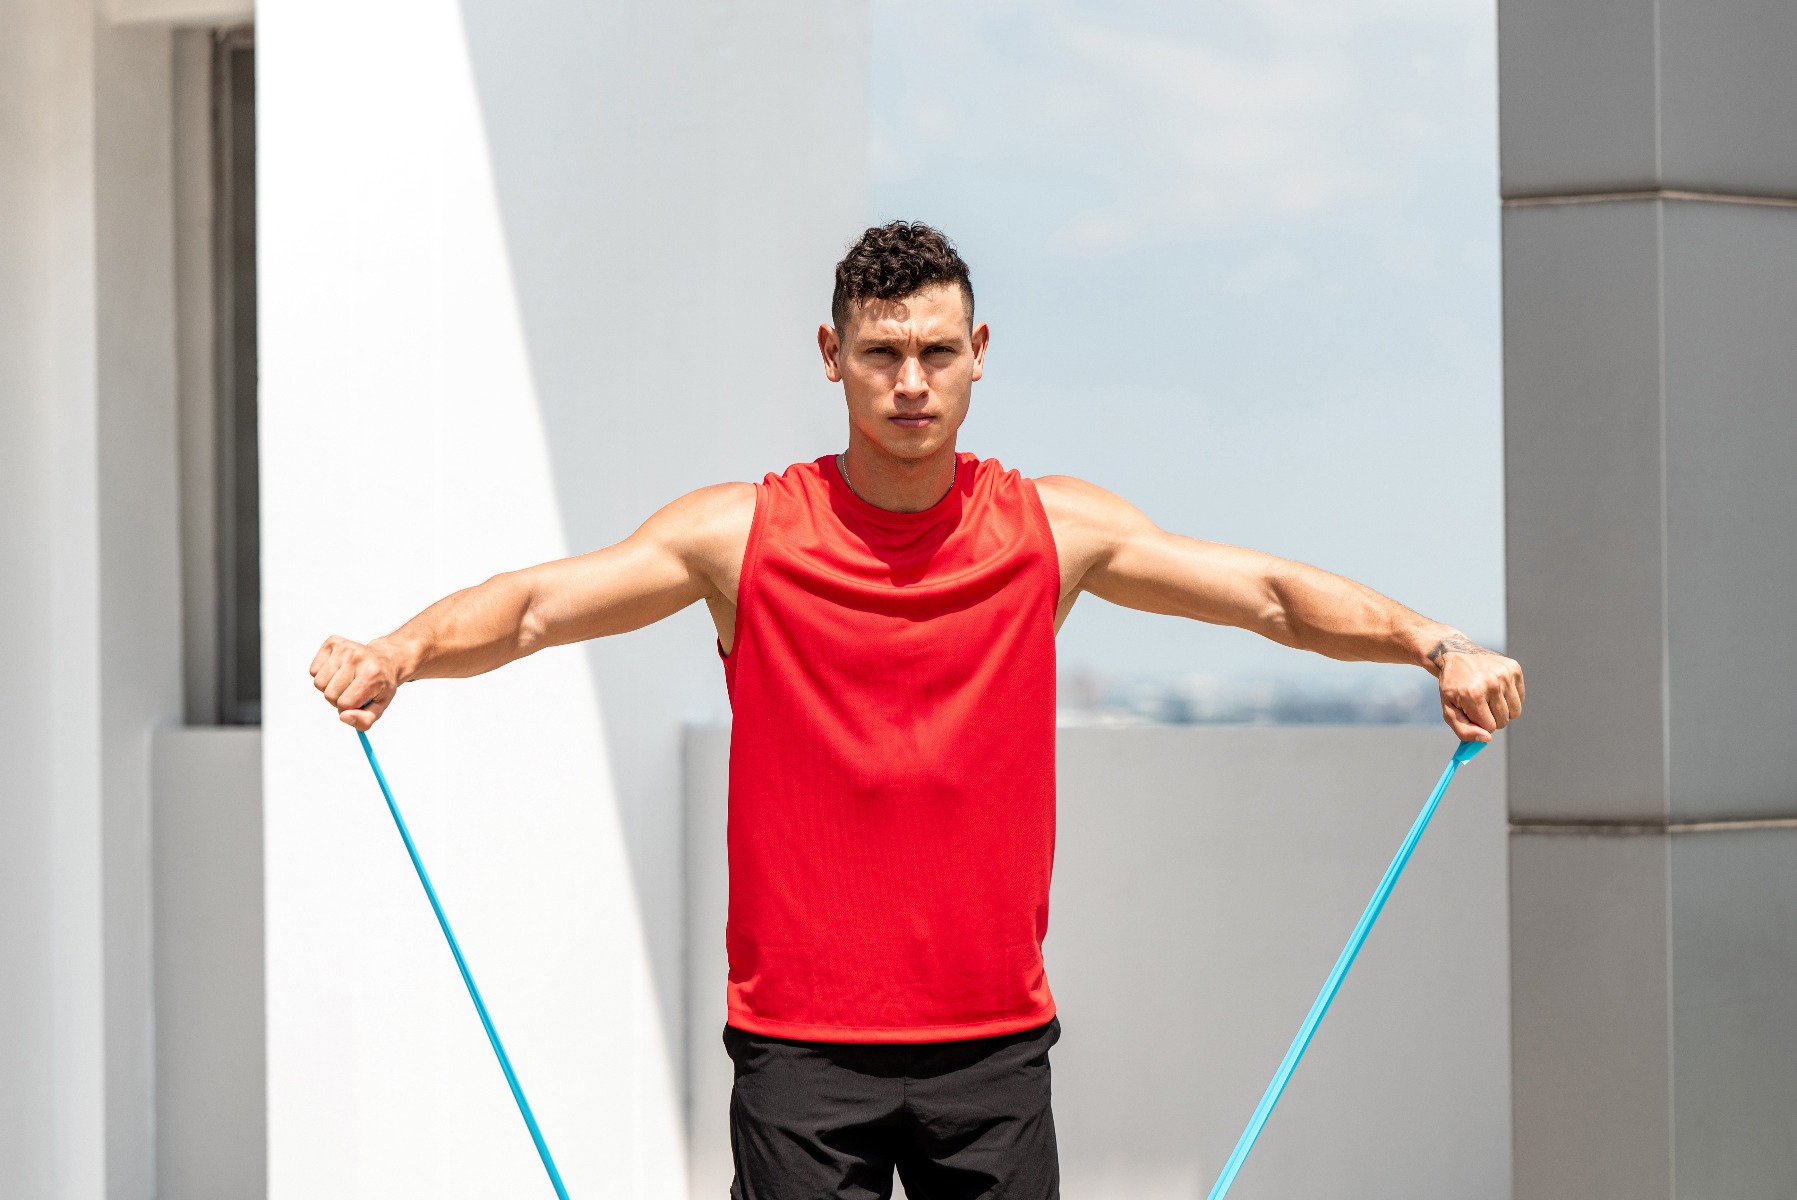
- Stand on the resistance band with your feet at shoulder-width and the ends in each hand.
- Lift your arms straight out and up to the sides at shoulder height.
- Slowly lower your arms back down to your sides. Keep your chest up and core and glutes engaged.
Resistance Band Row
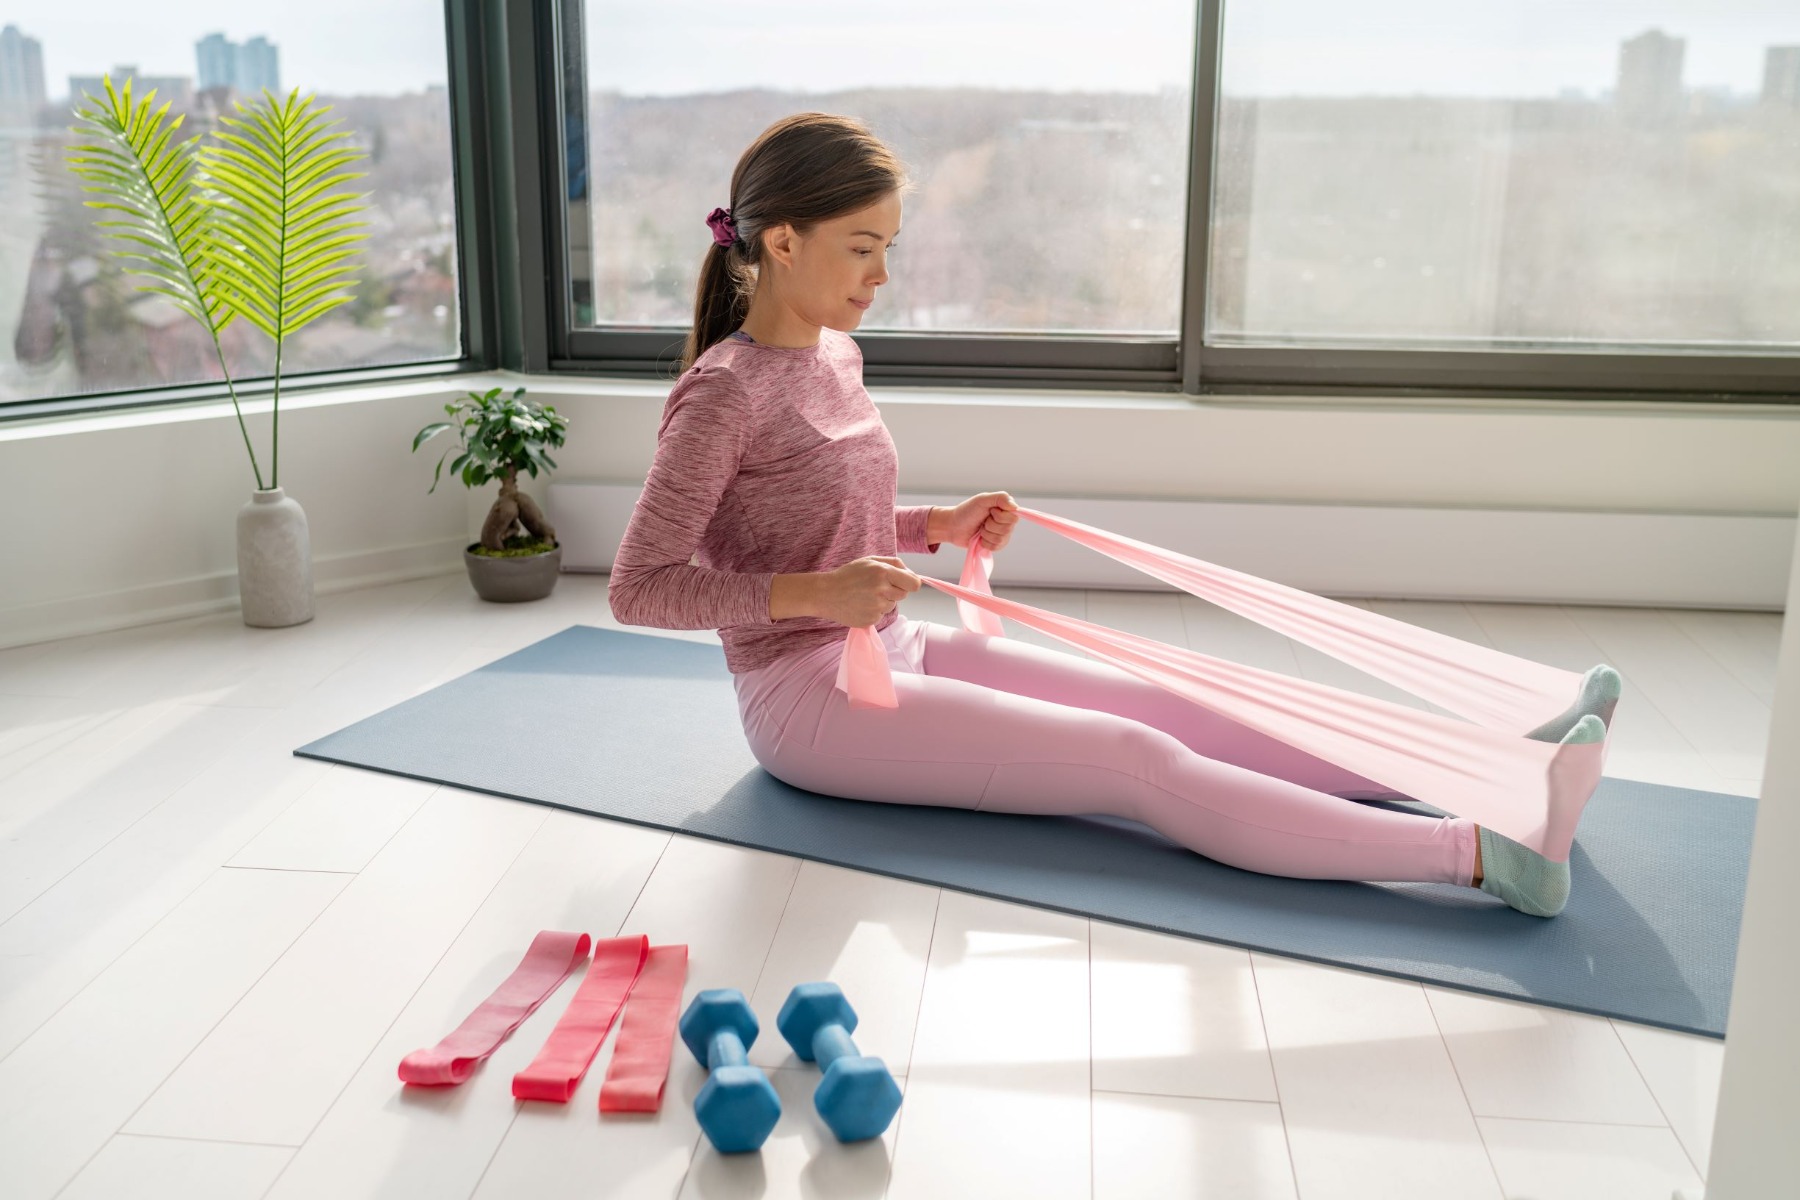
- Begin in a seated position on the floor with legs straight out in front of you.
- Holding the end of the resistance band in each hand, place the center of the band around your feet.
- Sit tall with core engaged and hold the band in front of you with elbows bent next to your side.
- Pull the ends of the band back until it is next to your sides and elbows are behind you. Pause and then slowly release.
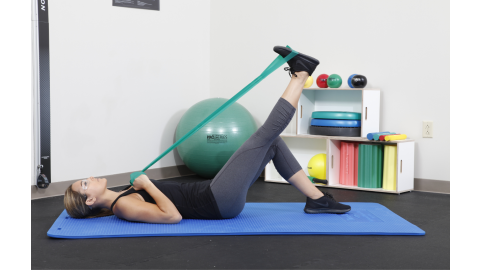
Resistance Band Overhead Press
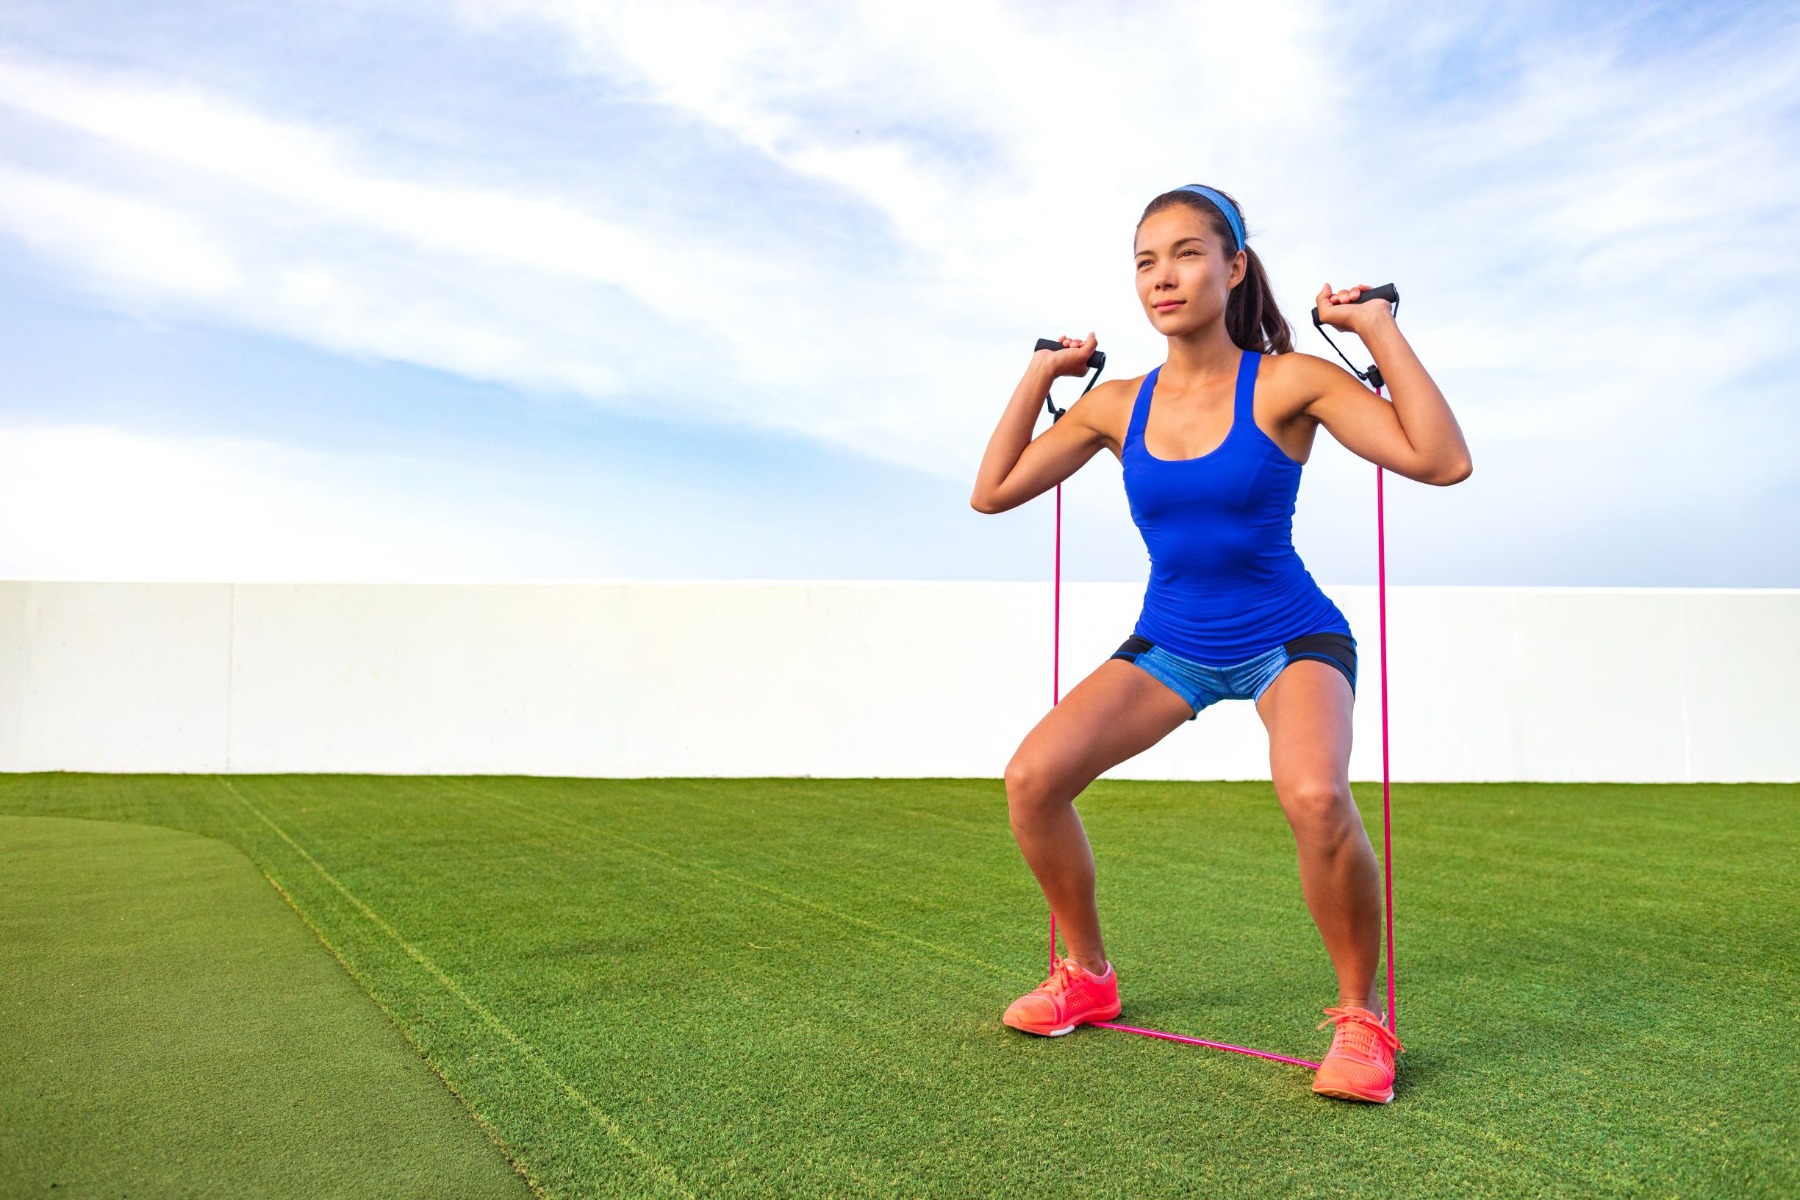
- Stand on your resistance band with your feet shoulder- width apart. Hold the end of the band in each hand.
- Curl up your arms until your hands are in line with your shoulders, elbows out to the side and palms facing forward.
- Keeping your glutes squeezed and core engaged, press your arms straight overhead against the resistance of the band.
- Lower your arms until your hands are in line with your shoulders.
V-Ups
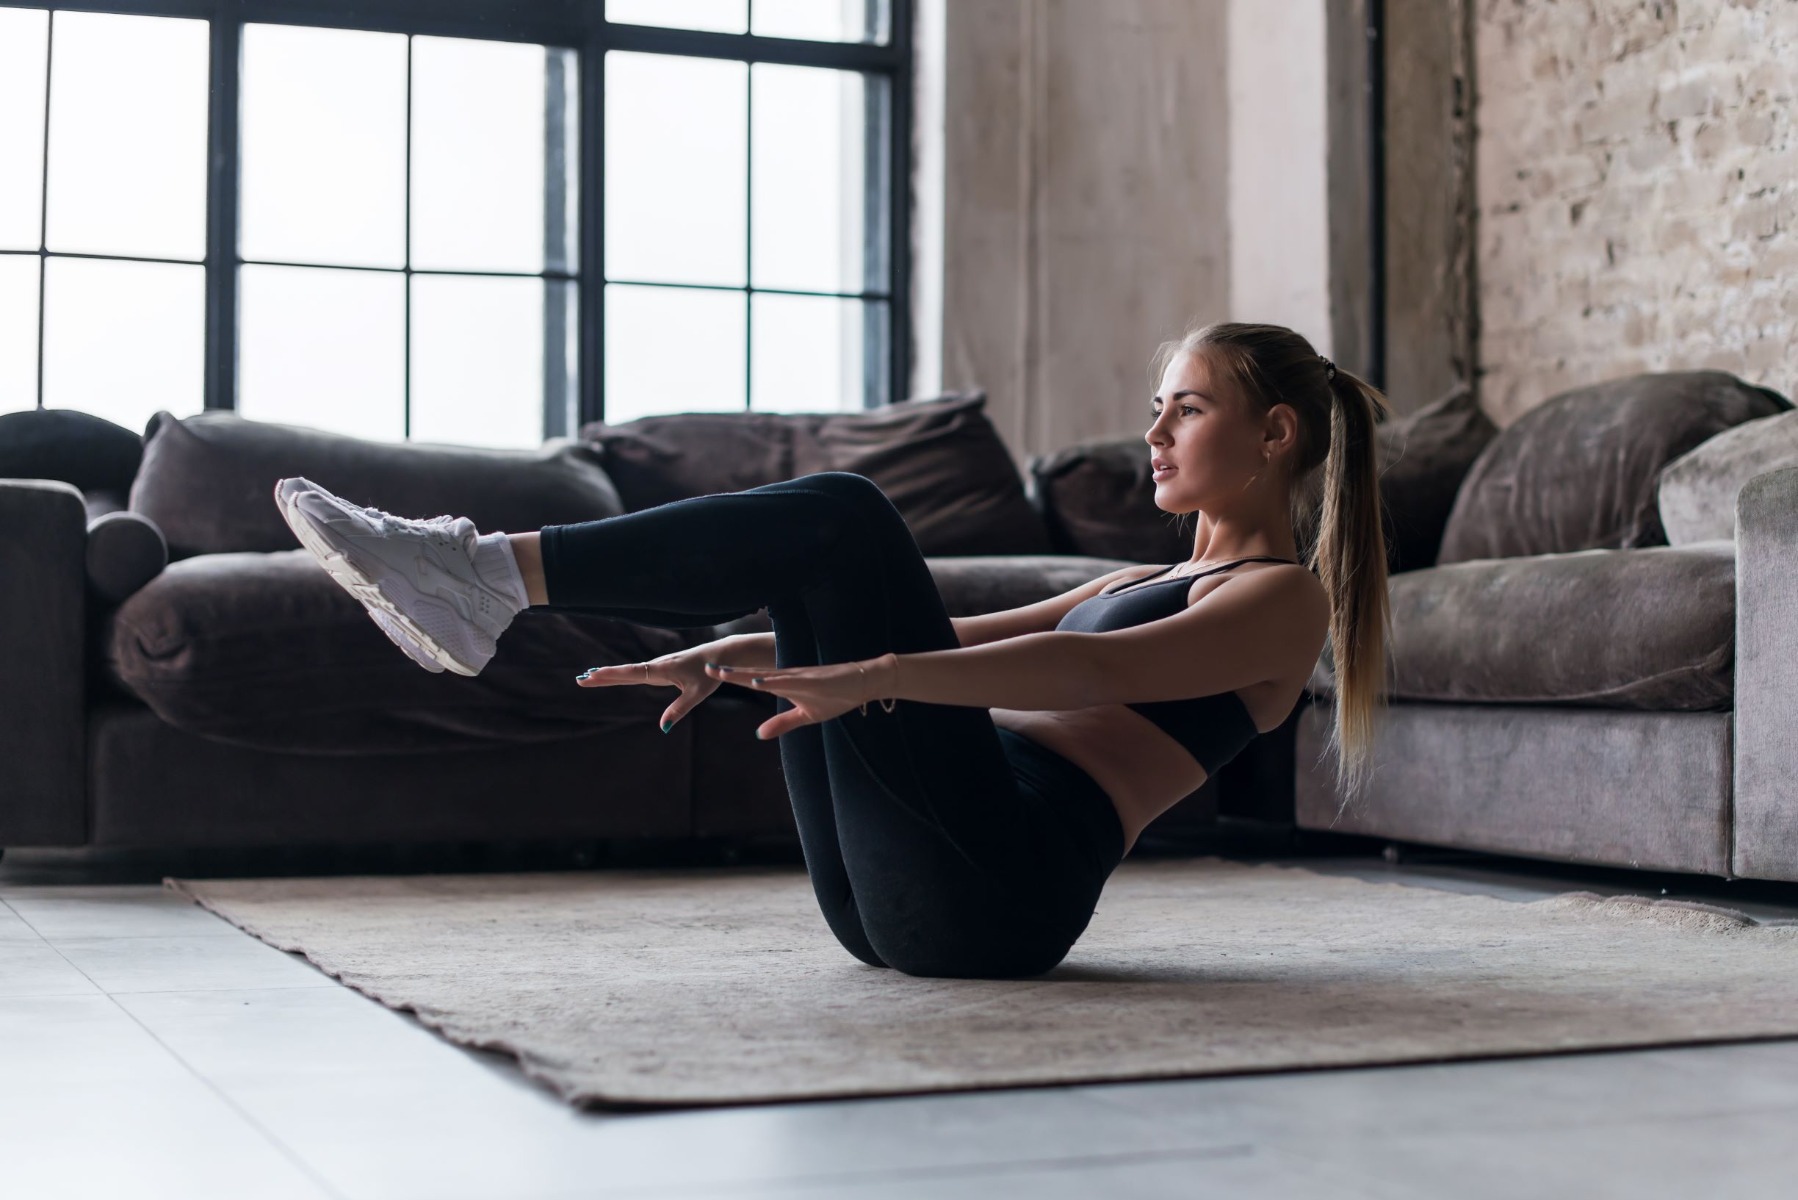
- Lie on your back with your feet together and toes pointed.
- Keep your legs straight and lift them up as you simultaneously raise your upper body off the floor.
- Keep your core tight as you reach for your toes with your hands. Slowly lower yourself back down to the starting position.
Plank
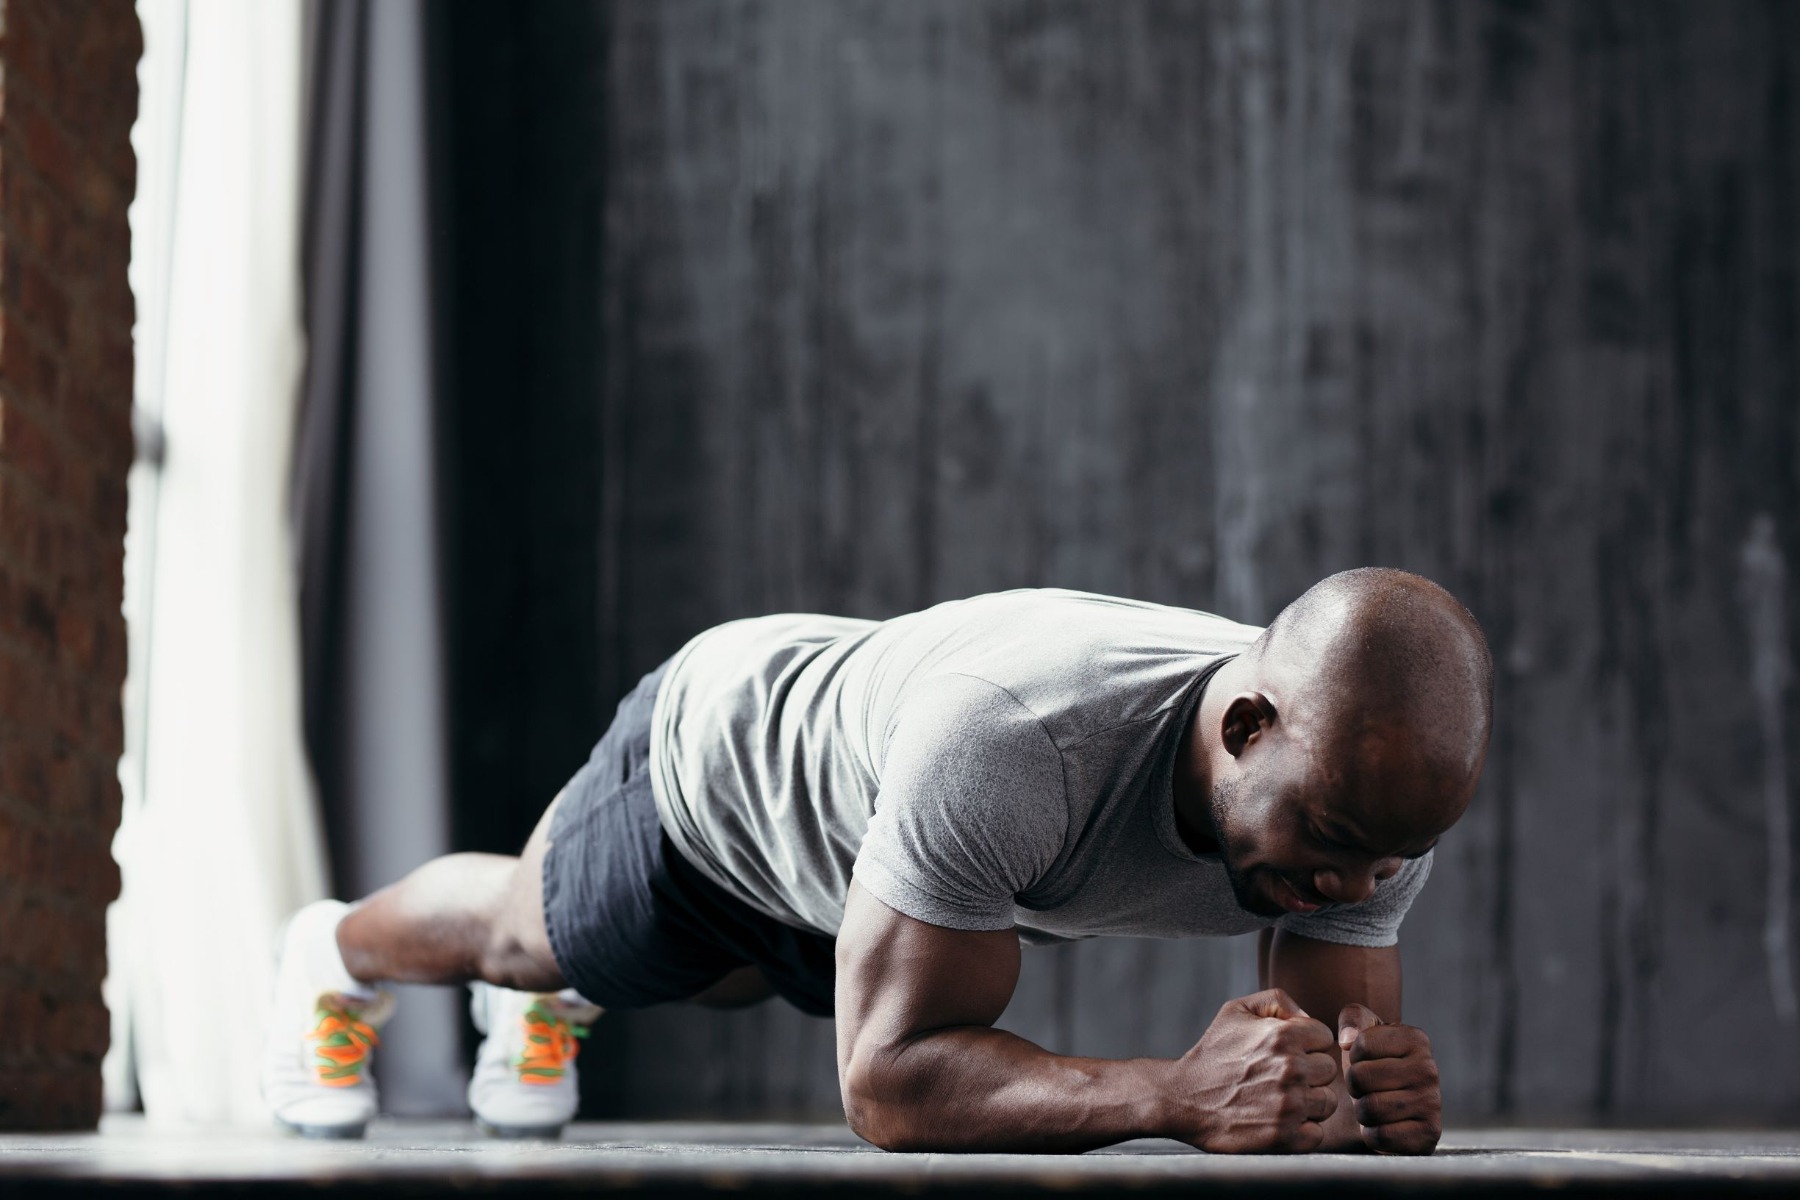
- Begin in the plank position, face down with your forearms and toes on the floor. Position your elbows directly under your shoulders. Your head is relaxed and you should be looking at the floor.
- Engage your core muscles and keep your torso straight. This is the neutral spine position. Your heels should be over the balls of your feet.
- Hold this plank for 30-45 seconds before slowly lowering to the floor.
Sit-Up with Twist
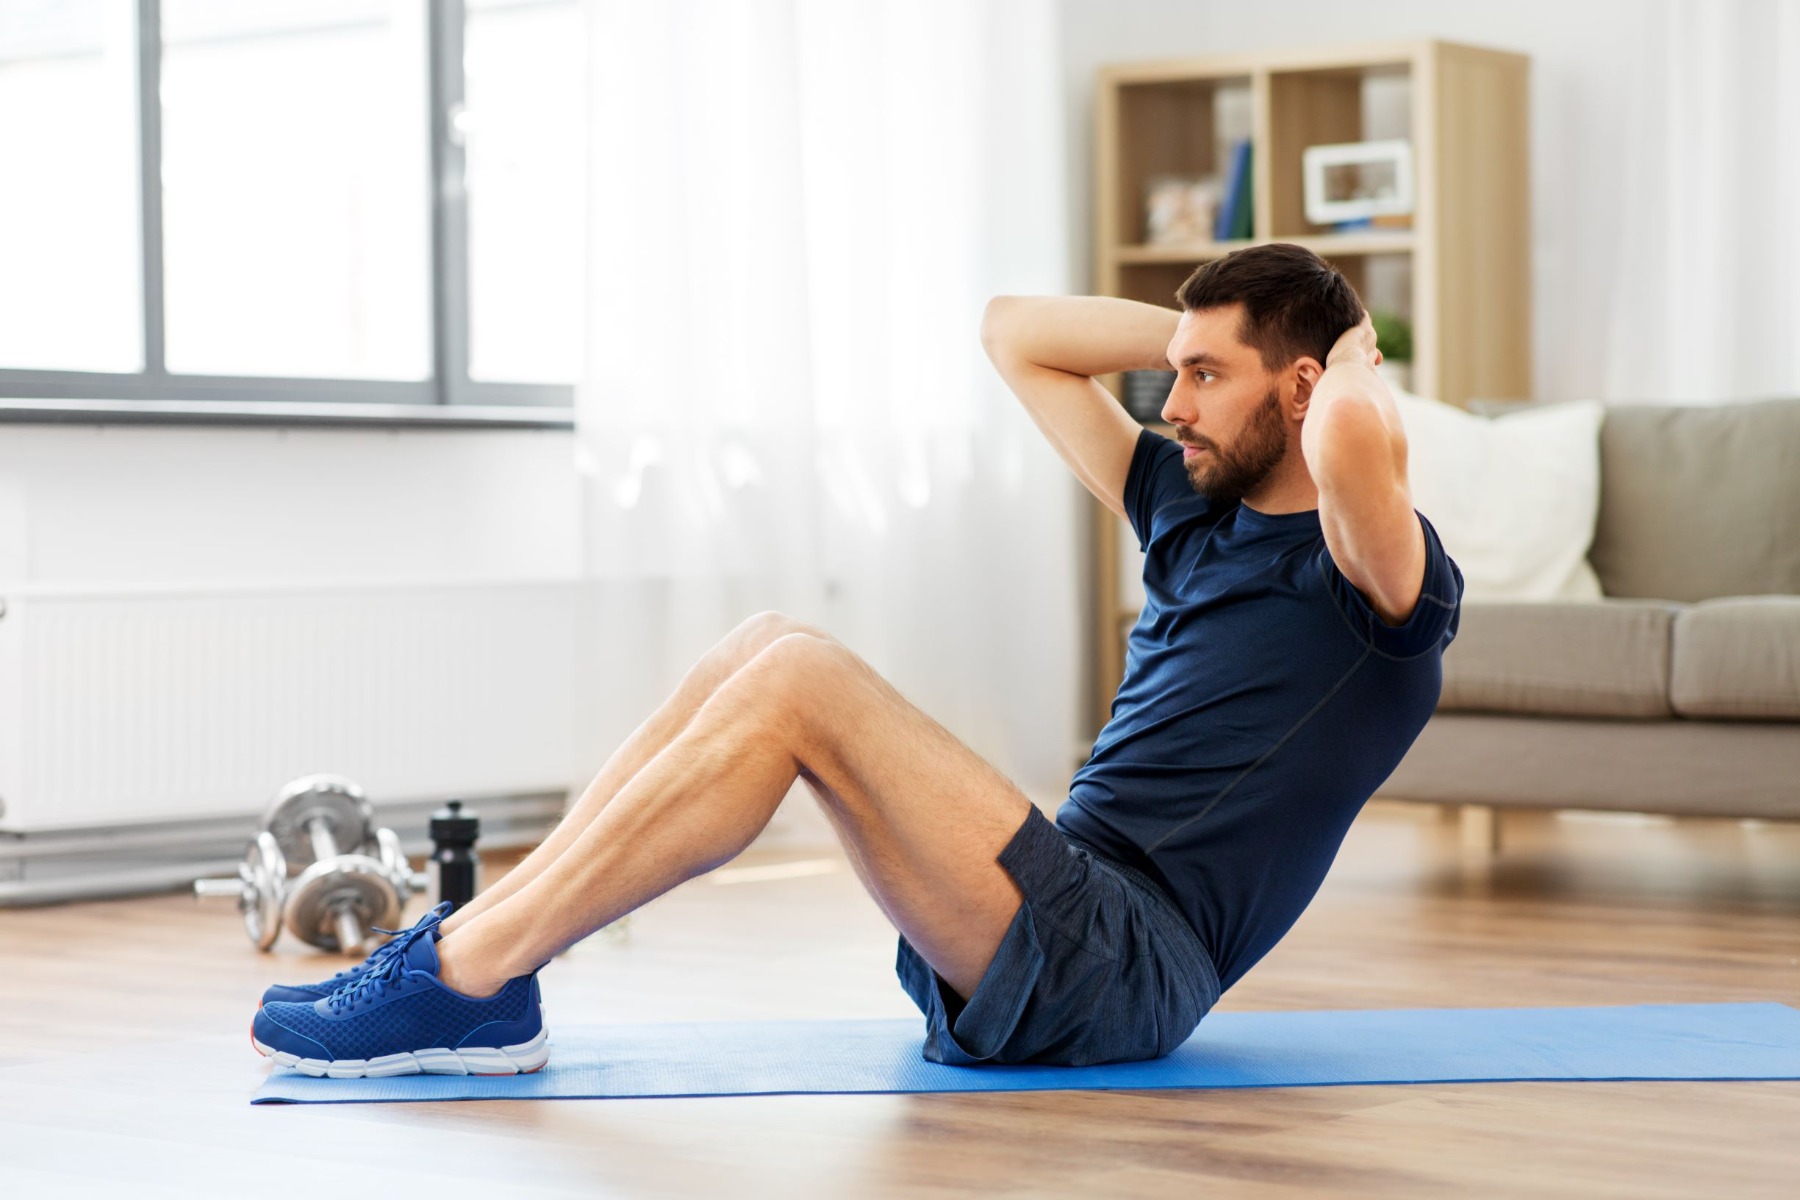
- Lie on your back with your knees bent. Keep the soles of your feet flat on the floor and clasp your hands behind your head.
- Lift up your torso and bend to the right until your left elbow touches your right knee.
- Return to starting position. Repeat the movement on the opposite side.
Common Volleyball Drills to Practice
Beginning drills can be used to change old bad habits and develop correct techniques with drill repetition. It can also serve as a good warm-up prior to games!
- Toss and Pass: This drill requires two players. One player tosses a ball to the other player to pass. Do this toss and pass 10 times before switching roles. After a few repetitions, try to pass the ball back and forth and see how long the ball can stay off the floor.
- Wall Hitting: This drill requires only one player, a ball, and a wall. Pick a spot on the wall to hit to. Toss the ball to yourself and try to hit the spot. Focus on using proper arm swing technique and mimic hitting skills. Toss the ball up, bring your arms up in the air, and then swing as if you were attacking the net.
- Serving: This drill requires two players, one standing on each side of the court. The players take turns serving to each other. Start serving inside the baseline so you are close enough to get the ball over the net.
- Setting: This drill requires two players, setting back and forth to each other over the net. If a player can't get to the ball with their hands, the player should then pass the ball to themselves and set the ball over the net.
5 Products to Help Relieve Pain
Most volleyball injuries are a result of overuse and overtraining. Whether it’s after a tough workout or a competitive game, there is a variety of products you can use to provide additional support and prevent injuries. Check out some of our top recommendations!
1. TheraPearl Shoulder Wrap
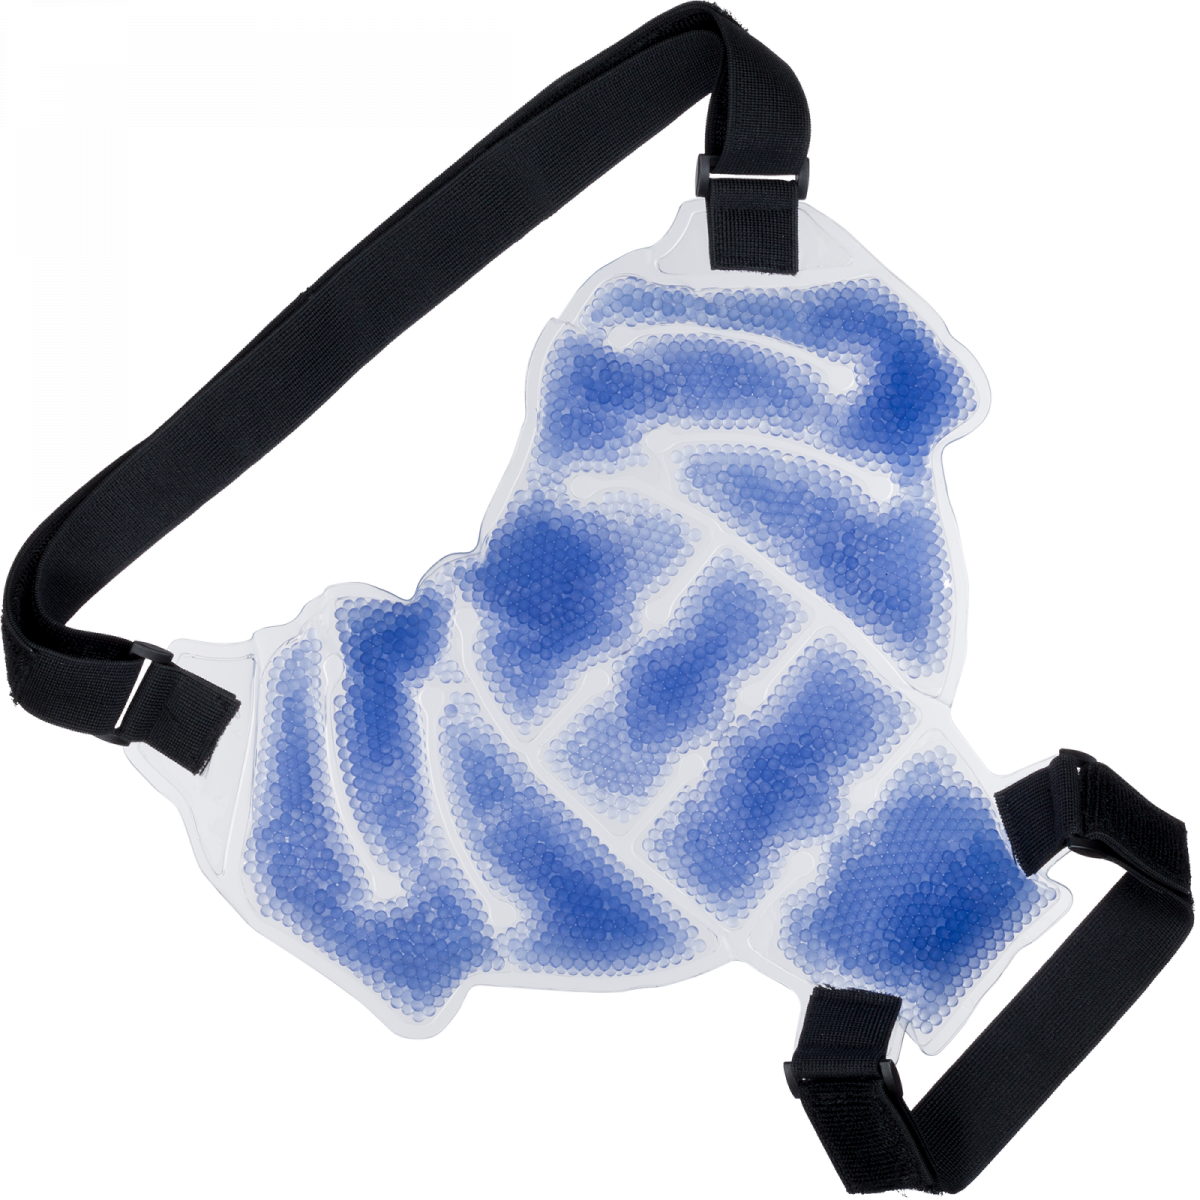
Relieve your shoulder pain using the TheraPearl Shoulder Wrap! Just heat in the microwave or freeze in your freezer for pain relief when you need it. The wrap is designed to fit your right or left shoulder using the D-ring adjustable straps.
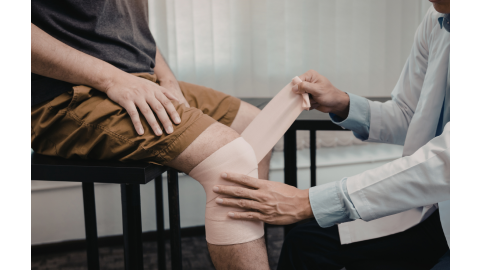
2. RolyanFit Knee Sleeve
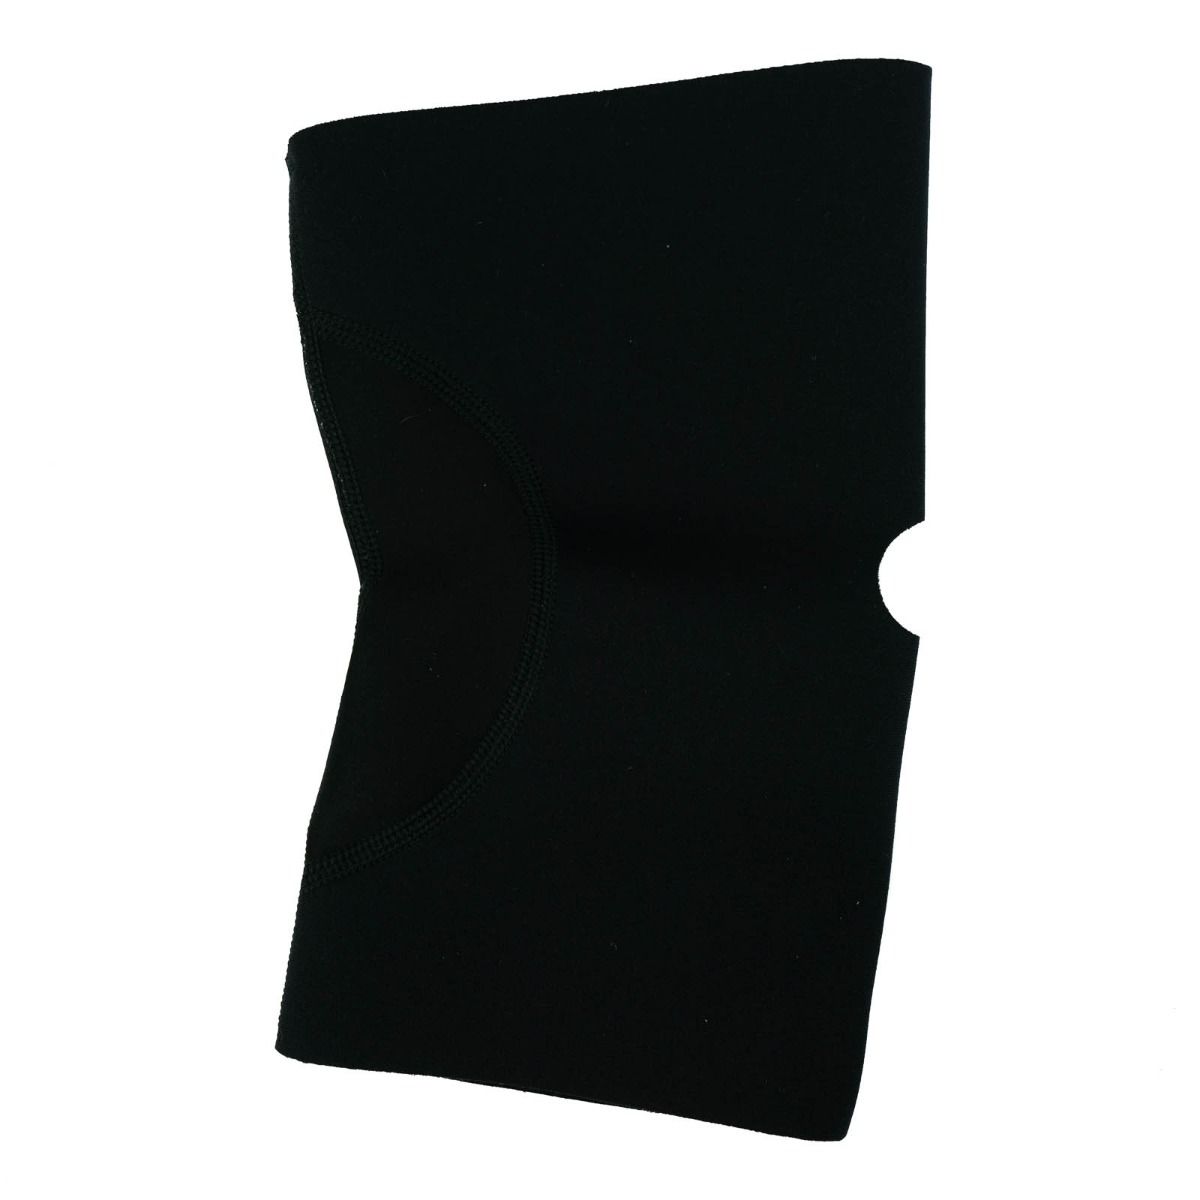
The neoprene sleeve helps support sore, weak, or injured knees by improving circulation to assist in healing and increased joint flexibility. The contoured shape of the sleeve fits either the left or right knee. For application, pull the sleeve onto the knee so that the opening of the knee is centered on the kneecap and on the open patella.
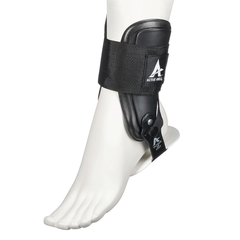
3. Active Ankle T2
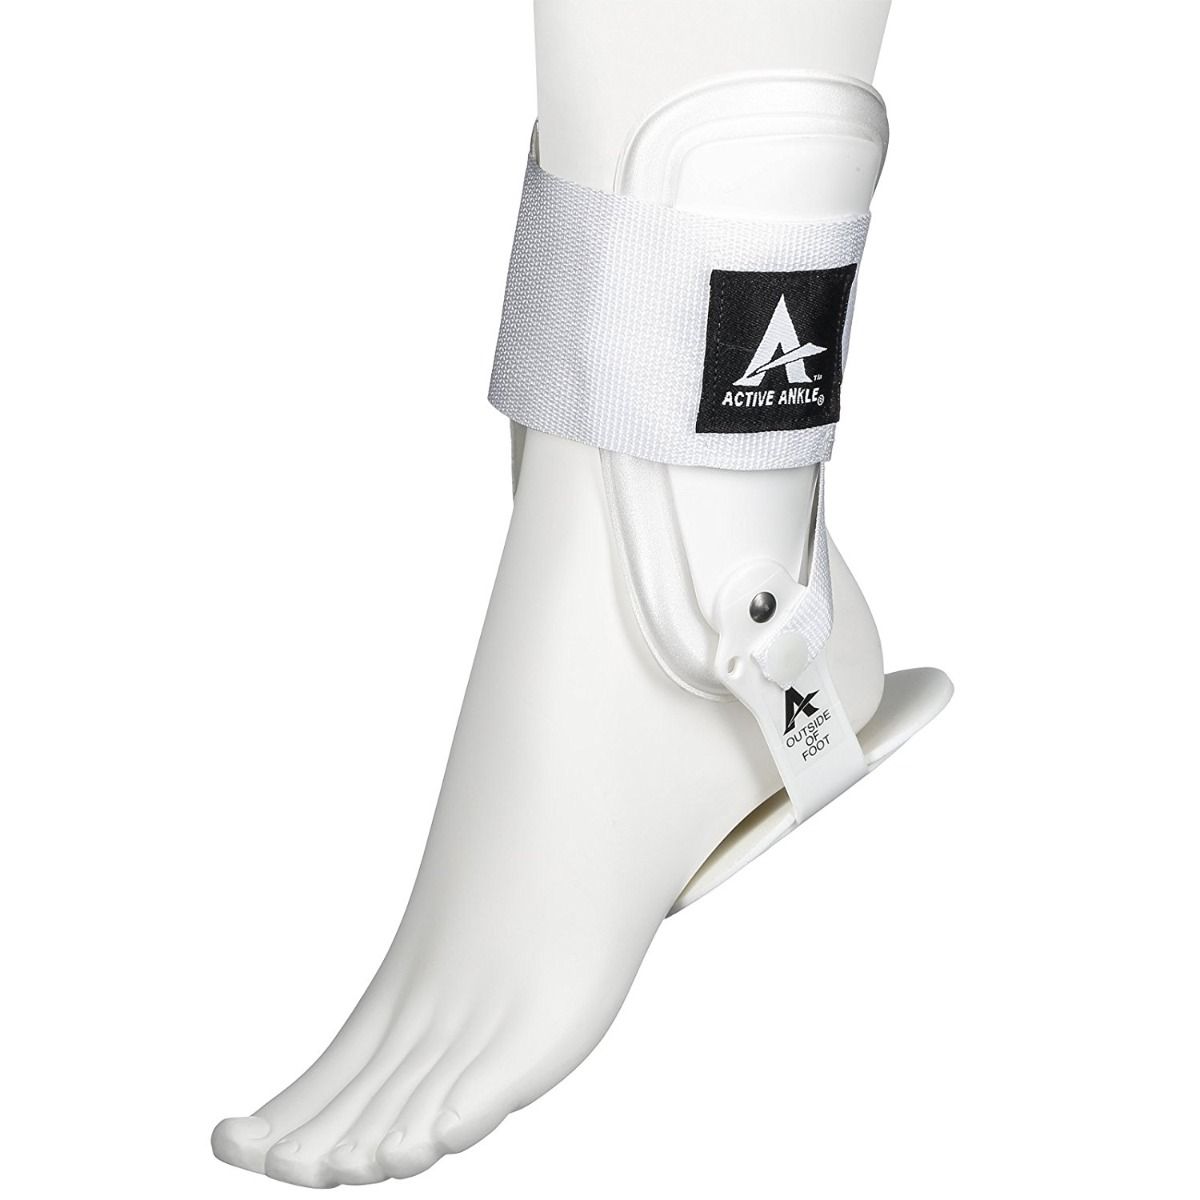
The rigid ankle brace adds stability for unstable or weak ankles, designed to protect the ankle against inversion and eversion. The anatomical bilateral hinge allows full foot range of motion in the ankle, suitable for minimizing the effect of sprain and strains.
4. Hg80 Premium Wrist Brace
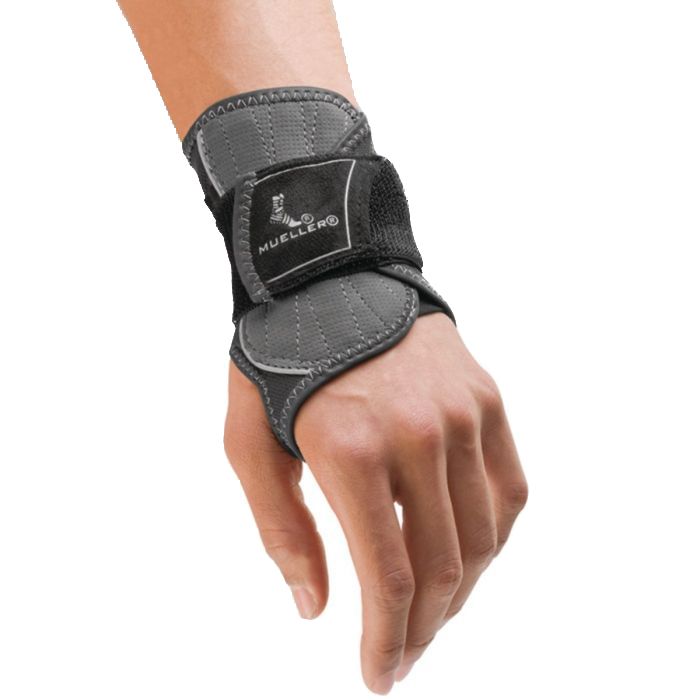
With exclusive moisture wicking HYDRACINN fabric, the wrist brace allows full finger and thumb movement. Flexible steel springs over the top and bottom of wrist provides double protection.
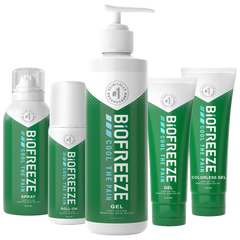
5. Biofreeze
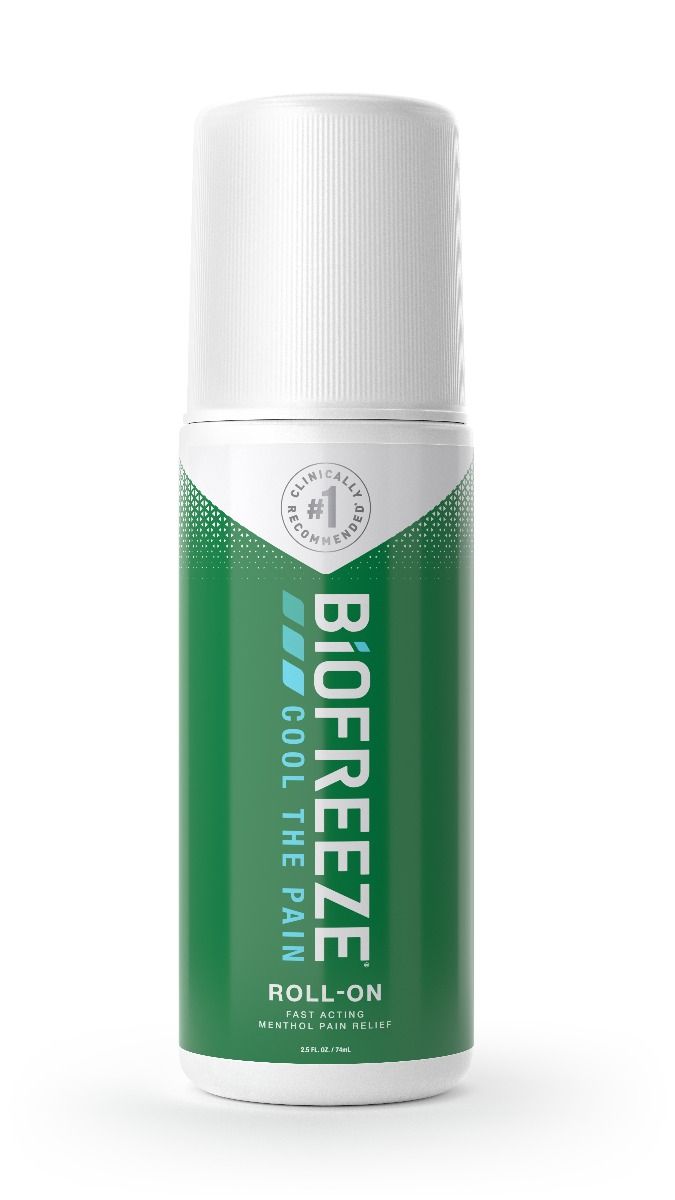
This pain relief formula is clinical research-proven, fast-acting, and long lasting. It penetrates quickly to relieve aches and pains. Biofreeze is great for sore muscles and joints, sprains, strains, and bruises, and can be applied to body parts such as the hand, wrist, shoulder, foot, knee, hip, back, and neck.
References:
1. Irena. (2019). How to Get Ready for Volleyball Season. ProRecAthlete. Retreived from https://bit.ly/3nf2n25
2. UPMC Sports Medicine. (2020). Common Volleyball Injuries: Tips, Prevention, and Treatment. UPMC. Retrieved from https://upmc.me/2Qpd3PG
3. Zidek, Marie. (2016). 10 Volleyball Specific Strength Exercises & Workouts. The Art of Coaching Volleyball. Retrieved from https://bit.ly/3sEUYuc
Medical Disclaimer: The information provided on this site, including text, graphics, images and other material, are for informational purposes only and are not intended to substitute for professional medical advice, diagnosis or treatment. Always seek the advice of your physician or other healthcare professional with any questions or concerns you may have regarding your condition.