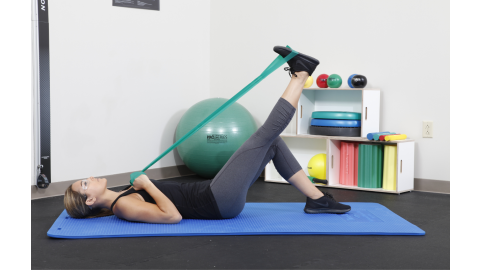
Recovering from a shoulder replacement? You may benefit from physical therapy to help you fully recover! Your physical therapist will work with you to decrease pain, improve your shoulder range of motion and upper extremity strength. Implementing exercise at home can also help you regain function of your shoulder and arm. Here are 7 exercises to get you back to your daily life!
Why do people get shoulder replacements?
The shoulder joint is not just a simple joint, but rather a ball and socket joint, held together by muscles, tendons and ligaments. If you suffer from osteoarthritis, severe fractures or rheumatoid arthritis, most likely you will be recommended for shoulder replacement surgery. In shoulder replacement surgery, the damaged parts of the shoulder are removed and replaced with artificial components.
Following your procedure, a physical therapist will teach you exercises to help strengthen the new joint and improve range of motion. You can begin these shoulder exercises 2-4 weeks after your operation. Most of the recovery is complete around 6-9 months. It is highly recommended that you stretch and exercise daily to help avoid complications or dislocation of your new joint.
Post-Shoulder Replacement Surgery Tips
During the first week of recovery, your physical therapist will personalize a recovery regimen to help you reach certain goals. Be sure to talk to a medical professional before beginning any new exercise routine.
It is important to come out of the sling to bend and straighten the elbow for 10-15 repetitions each time to minimize arm and hand swelling. In addition, implement grip strengthening exercises using a hand therapy ball. Begin the exercise by making a tight fist with the ball resting in the palm of your hand. Hold this position for 10 seconds and then release. Repeat this exercise 10 times per day.
We’ve also come up with a few stretching exercises to help loosen stiff muscles that surround the shoulder joint.
Cross-Arm Stretch
- Let your right arm hang near your waist and use your left hand to grab your right elbow
- Pull the right arm across your chest towards your left arm. Hold the position for 30 to 60 seconds to feel a stretch
- Repeat using your other arm and make sure to complete this cross-arm stretch three to five times
Neck Stretch
- Stand with your feet positioned hip-width apart and allow your arms to hang loose at your sides
- Look straight ahead and tip your head to the right and try to touch your ear to your shoulder
- You should feel the stretch that pulls along your left shoulder and neck. Hold for 10 seconds
- Repeat the exercise on the back shoulder and perform this neck stretch three times for each side
Shoulder Roll
- Stand with your back straight and your feet apart and dangle your arms at your sides
- Take a deep breath and lift your shoulders up to slowly rotate. Move your shoulders back while lifted so that you can squeeze your shoulder blade muscles together
- Exhale and lower your shoulders. Move your shoulders forward to feel a stretch along the backside of your shoulders
- Moving slowly, repeat this shoulder roll 10 times. You can also repeat this exercise in the opposite direction
Internal Rotation Towel Stretch
- Grasp a rolled-up towel firmly with both hands and gently pull the towel toward the ceiling with your top hand
- You should feel a stretch in the shoulder of your opposite arm as your lower hand is gently pulled farther up your back
- Hold for about 30 seconds and switch hands and repeat the internal rotation towel stretch 5 times
7 Exercises to Build Strength and Improve Range of Motion
We’ve come up with 7 resistance exercises, designed to help you build strength and increase range of motion. Make sure to check with your physical therapist or orthopedic surgeon before performing any of the exercises shown below. In addition, remember to always use pain as a guide when exercising. If you do too much, too soon you may delay healing.
Each of the exercises provided below uses a resistance band to rehabilitate the shoulder. When choosing the resistance level right for you, start with a light resistance band and increase as you progress. If you’re having difficulty choosing, talk to your physical therapist.
|
|
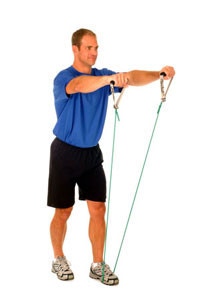
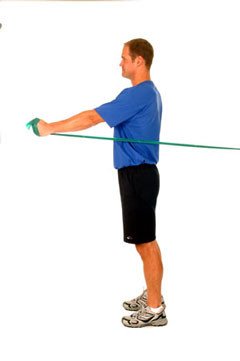
Shoulder Front Raise in Standing
- Stand on the middle of the resistance tubing rasp the soft handles
- Lift upward, keeping your elbows straight and palms facing the ground. Stop at shoulder level, hold and slowly return
- Tip: Make sure to keep your shoulder blades down, back straight and avoid shrugging your shoulders
Variation: Lift arms completely overhead for full range of motion |
|
|
|
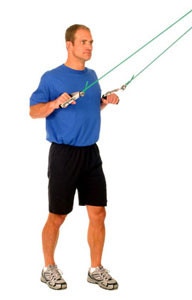
Shoulder Lat Pull Down (Standing)
- Secure the middle of a long band or tubing to a stationary object above shoulder level, facing the attachment
- Grasp the ends of the tubing above shoulder height with your elbows extended
- Bend your elbows and bring your hands to your chest, pulling the bands down and back. Hold and slowly return
- Tip: Keep your back and neck straight
|
|
|
|
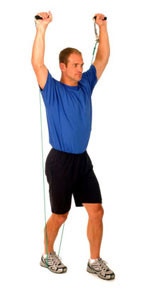
Shoulder Overhead Press (Standing)
- Stand on the middle of the resistance tubing
- Grasp the ends of the tubing at shoulder level
- Lift the tubing upward overhead, extending your elbows. Hold and slowly return
Variation: Perform either in front of the neck or behind the neck. Make sure to keep your back and neck straight |
|
|
|
Shoulder Reverse Flies
- Securely attach the middle of a long band or tubing in front of you at shoulder level
- Grasp the other end of the band in front of you at shoulder level
- Pull the bands outward and back, hold and slowly return
- Tip: Keep your back and neck straight and avoid leaning over
|
|
|
|
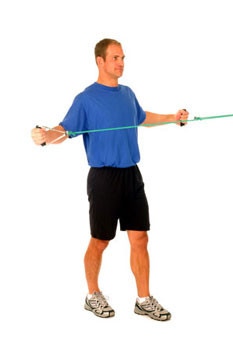
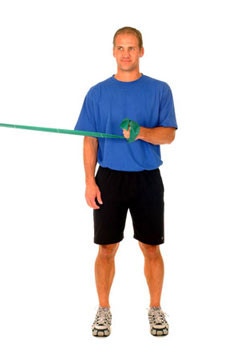
Shoulder External Rotation at 0 Degrees
- Begin with one end of the resistance band securely attached to a stationary object
- Grasp the other end of the band with slight tension
- Start with your elbow by your side and pull the band outward, keeping your elbow bent at 90 degrees
|
|
|
|
Shoulder External Rotation at 45 Degrees
- Begin with one end of the resistance band securely attached to a stationary object
- Grasp the other end of the band with slight tension
- Place your arm in the scapular plane (slightly anterior of the body) and abduct your arm to 45 degrees
|
|
|
|
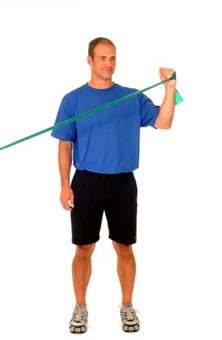
Shoulder External Rotation at 60 Degrees
- Begin with one end of the resistance band securely attached to a stationary object
- Grasp the other end of the band with slight tension and your elbow at your side bent to 90 degrees
|
|
Following your procedure, you may experience swelling and bruising of the hand and forearm. This results from the swelling and bruising from your shoulder, which travels down the arm. It’s recommended that you frequently bend and straighten your elbow as well as make a fist to help keep your circulation flowing. You can also try using a hot and cold pack to reduce inflammation and pain.

For the first several weeks after your surgery, it will be difficult to reach high shelves. Making small changes in your home before surgery can help make your recovery easier. In addition, when you come home from the hospital, you will need help for a few weeks with daily tasks. To prevent damage to your new joint, purchase products to extend your reach when grooming or bathing.
References
- Anonymous. (2020). Recovering from Shoulder Replacement Surgery. USCF Health. Retrieved from https://bit.ly/3ihZOJz
- Anonymous. (2020). Post-Shoulder Replacement Surgery Exercises. USCF Health. Retrieved from https://bit.ly/2RdsLub
Medical Disclaimer: The information provided on this site, including text, graphics, images and other material, are for informational purposes only and are not intended to substitute for professional medical advice, diagnosis or treatment. Always seek the advice of your physician or other healthcare professional with any questions or concerns you may have regarding your condition.


 France
 Australia